APP
Navigate to the APP page in the left-side navigation panel.
This page serves as the central management interface for system functionality expansion, enabling quick activation and configuration of multiple pre-installed network applications and services, including: AdGuard Home, Samba Configuration, Package Management, ZeroTier and VPN Services. Most applications support one-click deployment and automated configuration, significantly reducing the operational complexity and enabling seamless setup for users of all experience levels.
Warning
Some certain services — such as VPN Services — do not support running multiple client instances simultaneously. Please carefully select the appropriate function based on your network requirements and usage scenario to avoid conflicts.
AdGuard Home
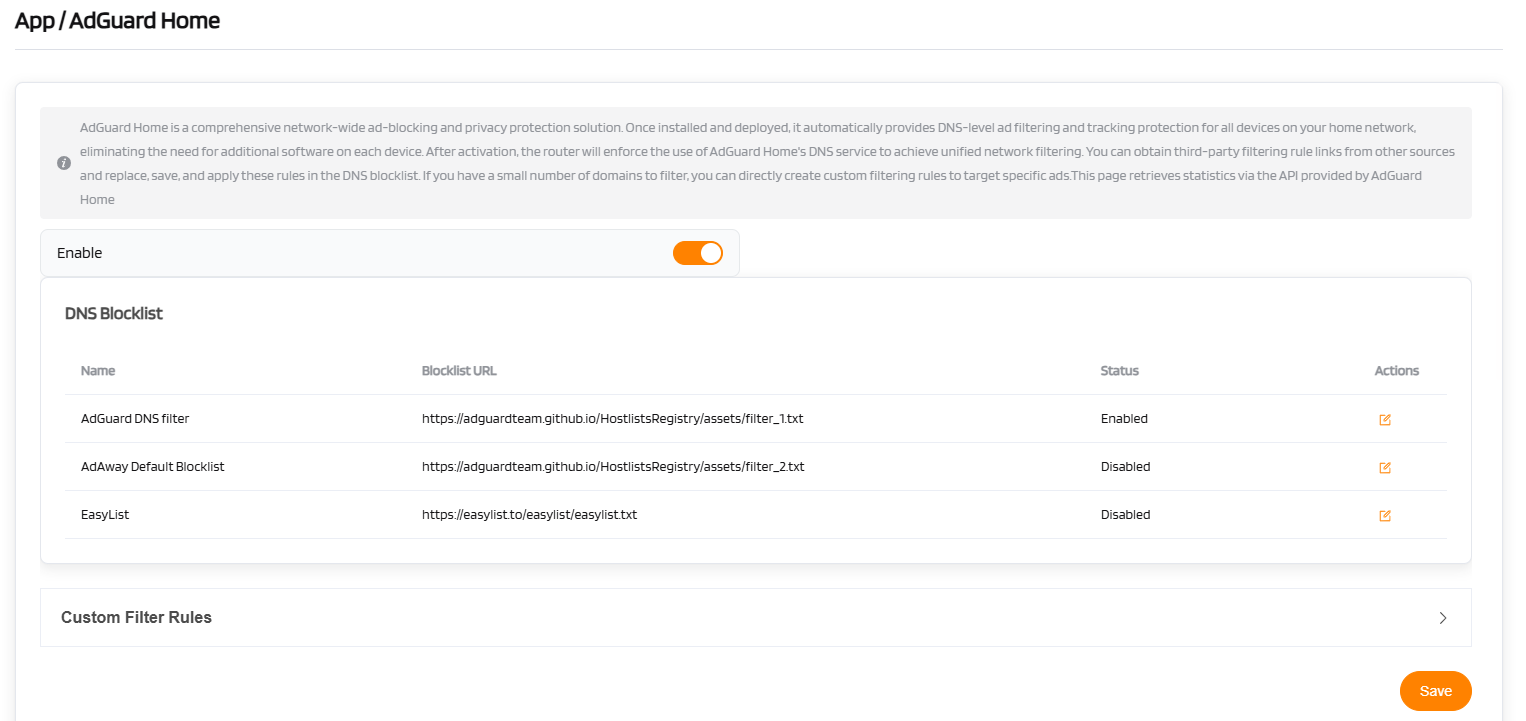
AdGuard Home is a network-wide ad-blocking and privacy protection solution. Once deployed, it automatically provides DNS-level ad filtering and tracking protection for all devices on the home network—no additional software installation is required on individual devices. When enabled, the router enforces the DNS service provided by AdGuard Home to achieve unified network filtering.
| AdGuard Home | Configuration |
|---|---|
| Enable | [Toggle to enable] |
| DNS Blocklist | [Predefined blocklists with URLs and status (Enabled/Disabled)] |
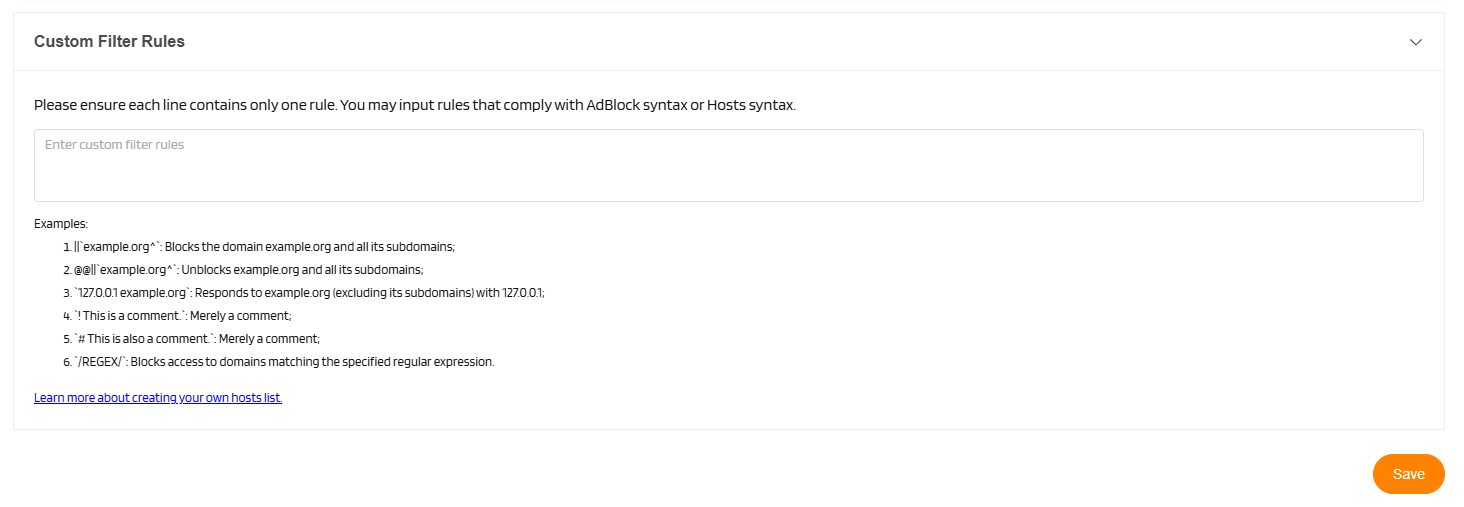
| Custom Filter Rules | [Enter custom ad-blocking rules (optional)] |
| Operation | Save |
Predefined DNS Blocklists:
-
AdGuard DNS Filter: https://adguardteam.github.io/AdGuardSDNSFilter/Filters/filter.txt (Enabled by default)
-
AdAway Default Blocklist: https://adaway.org/hosts.txt (Disabled by default)
-
EasyList: https://easylist.to/easylist/easylist.txt (Disabled by default)
Note
You can obtain additional third-party filter lists and apply their rules in the DNS settings. This includes custom rules to target specific advertisements.
Samba Configuration
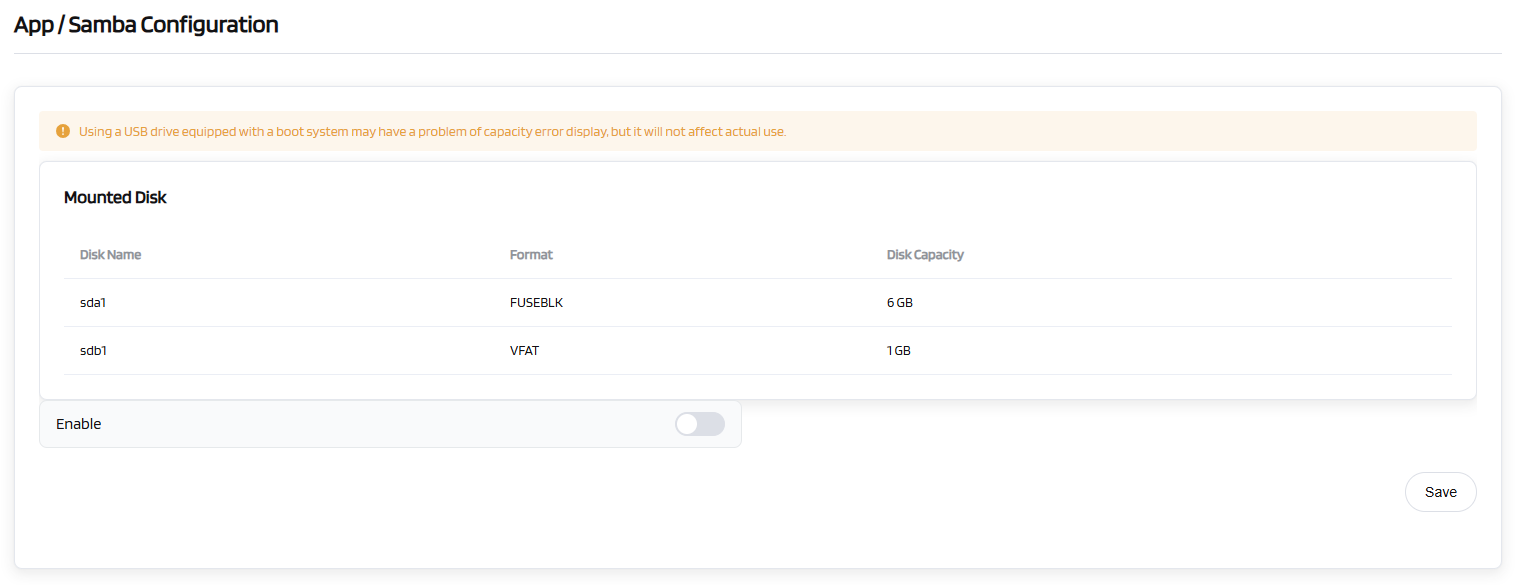
The VL7M19K router supports external storage devices (e.g., USB drives, MicroSD cards). Connected devices can share and access the contents of the external storage, allowing easy reading and modification of files.
| Samba Configuration | Configuration |
|---|---|
| Mounted Disk | [Displays details of connected storage: Disk Name / Format / Disk Capacity] |
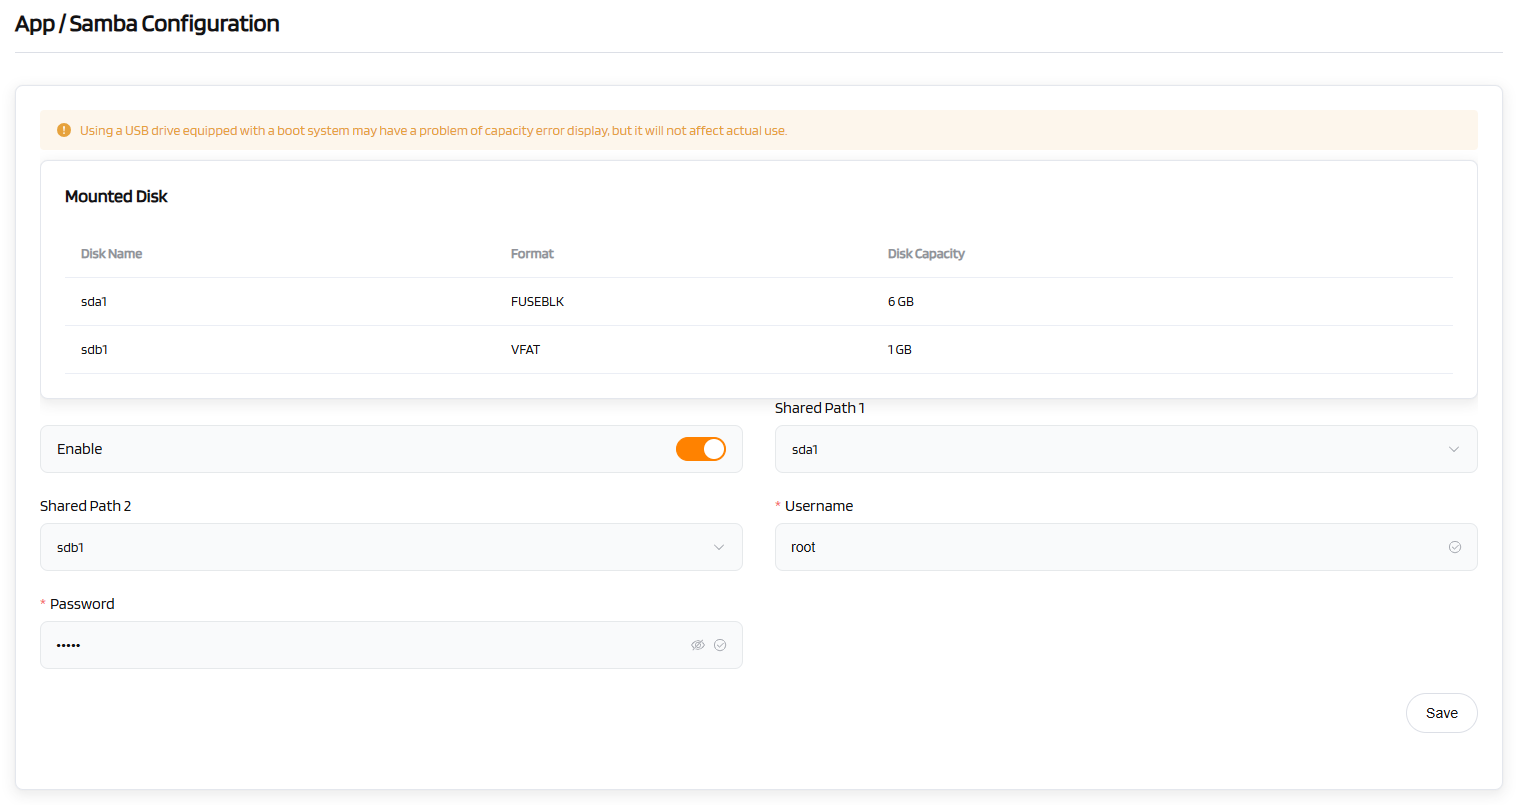
| Enable | [Toggle to enable network storage sharing] |
| Shared Path 1 | [Select the first shared directory] |
| Shared Path 2 | [Select the second shared directory] |
| *Username | [Set a username for accessing the shared storage] |
| *Password | [Set a password for accessing the shared storage] |
| Operation | Save |
Steps:
- Insert your USB drive into the router's USB 3.0/2.0 port. Please ensure the drive uses a common readable and writable format.
- Connect to the router's network via a wired or wireless connection. Open a web browser, log in to the router's management page, and navigate to "APP" ->"Network Storage" -> "Samba Configuration". If the guide path is incorrect, you can use the search bar in the upper-right corner to find "Samba" and access the settings page. Once the USB drive is correctly recognized, the interface should resemble the following screenshot:
- Click the "Enable" button to activate the Samba function. Fill in the required information as prompted on the page:
Shared Path 1: Select the partition of the external USB drive to serve as the storage address for the Samba function.
Shared Path 2: The secondary USB interface (for an alternate drive)
Username: Set the account username for accessing the Samba share.
Password: Set the password for the Samba function, as shown in the screenshot.
- To begin, ensure a PC is available. Open File Explorer by pressing Windows Key+ E, and verify that File Explorer is active.
- In the left navigation pane, right-click on "Computer" or "This PC," then select "Map Network Drive" from the context menu.
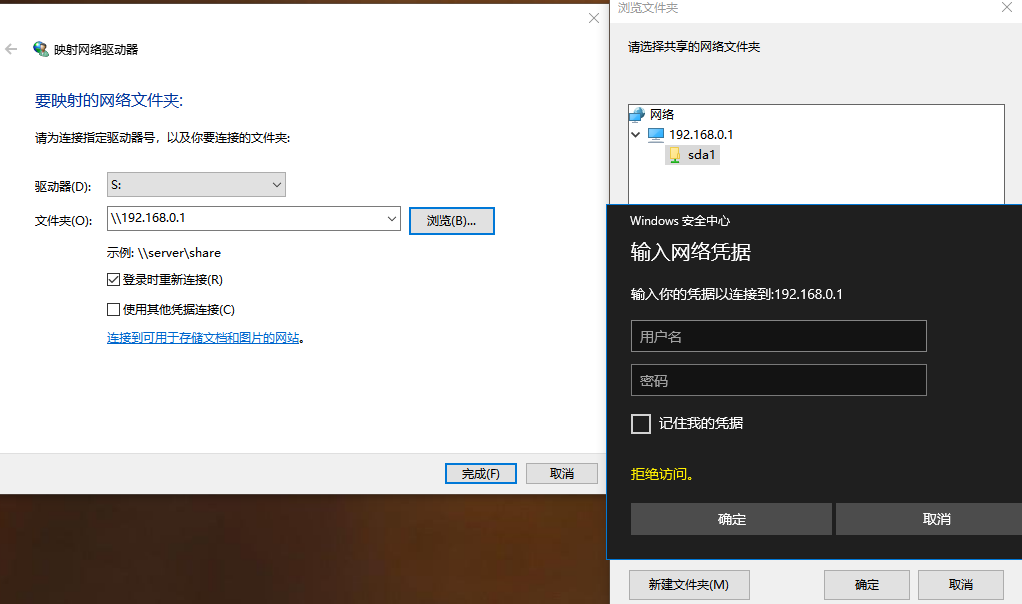
- Select an available drive letter (e.g., S) from the "Drive" dropdown menu.
- Enter the router’s administrative address as the folder path. For instance, the default address is: "\192.168.0.1".
- Click "Browse" and navigate to the address "\192.168.0.1". Select the Samba partition name displayed in the web interface, then enter the Samba username and password. The USB drive is now ready for read and write operations.
Tip
USB hard drives consume significant power. Use an external power supply for USB hard drives; otherwise, the device may malfunction.
Package Management
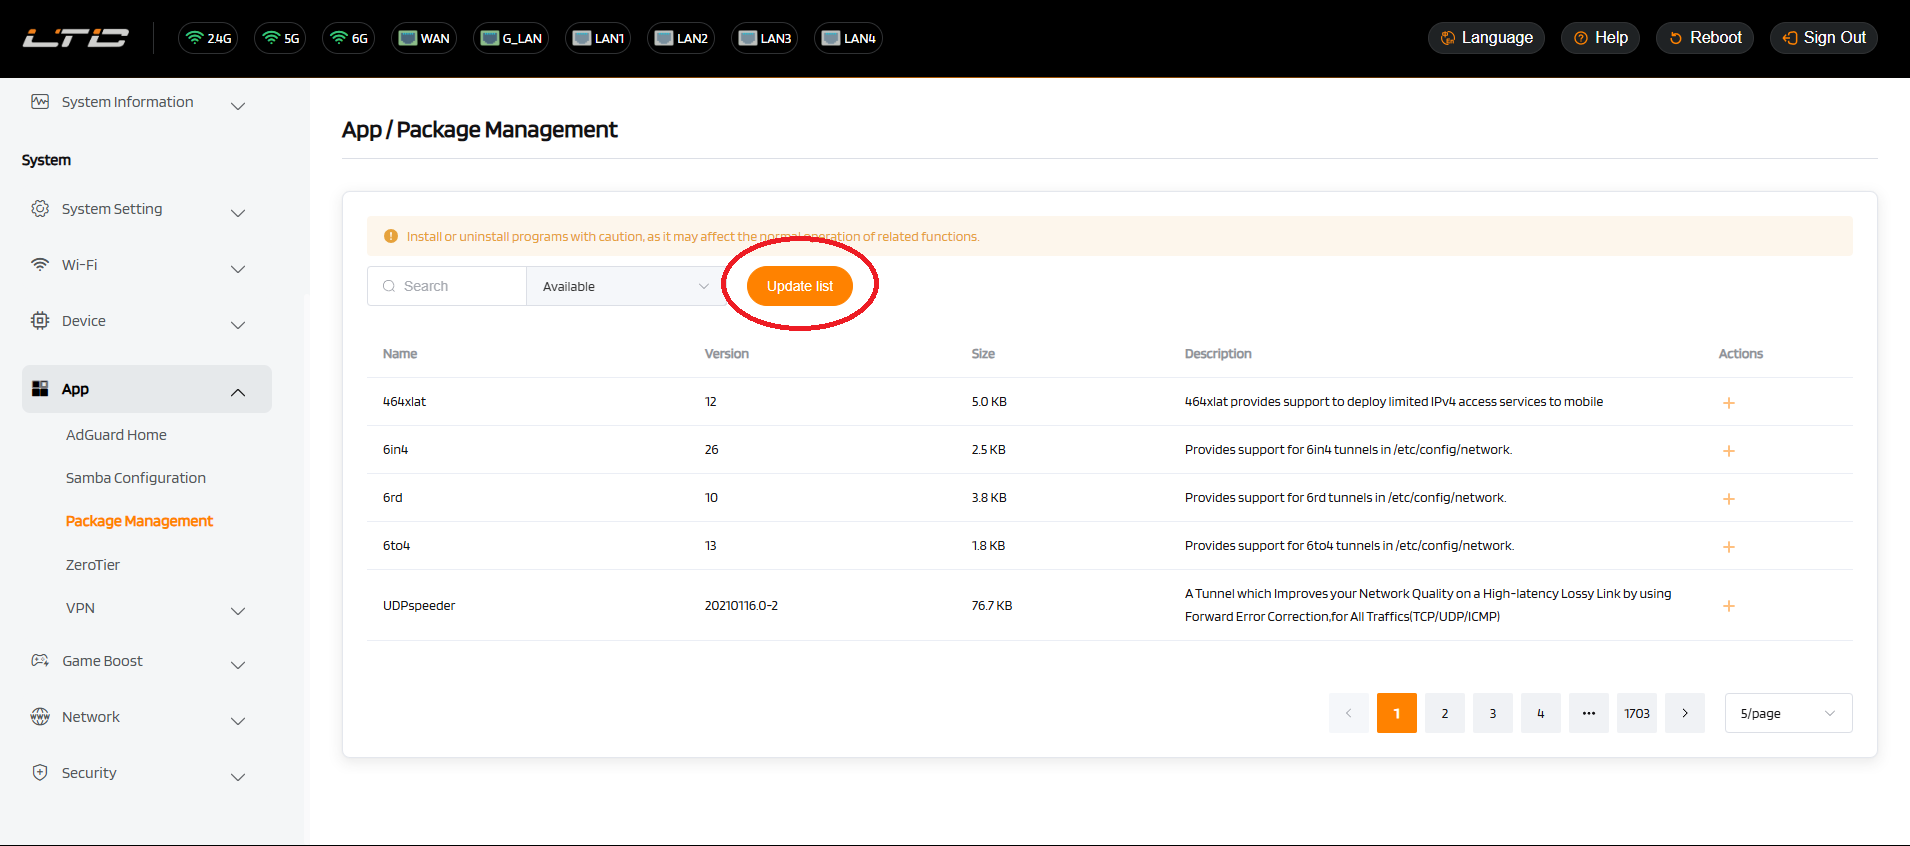
Package Management allows you to manage OpenWrt packages. You can install or uninstall any package.
Note
Caution when installing or uninstalling packages, as this may affect the normal operation of the router or related functions.
Always click Update when accessing the package repository to ensure you have the latest package list.
| Package Management | Operation |
|---|---|
| Search | [Enter keywords to search for packages] |
| Available Packages | [Displays the list of available packages] |
| Update List | [Click to update the package list] |
| Package Details | Name / Version / Size / Description |
| Actions | Install / Uninstall |
| Display | 5 entries per page |
Recommended Plug-ins
-
1. Network
| Plugin | Description | Use Case | Package |
|---|---|---|---|
| Turbo ACC | Hardware NAT acceleration | Maximize gigabit throughput | luci-app-turboacc |
| SQM QoS | Bufferbloat control, low latency | Gaming, video calls | luci-app-sqm |
| MWAN3 | Multi-WAN load balancing | Dual broadband, failover | luci-app-mwan3 |
| CPU Freq | Dynamic frequency scaling | Power saving, thermal control | luci-app-cpufreq |
-
2. Security
| Plugin | Description | Use Case | Package |
|---|---|---|---|
| IPSec Server | Native iOS/Android VPN | iPhone remote access | luci-app-ipsec-server |
| Fail2Ban | Auto-block brute force attacks | Public-facing routers | luci-app-fail2ban |
-
3. Remote Access
| Plugin | Description | Use Case | Package |
|---|---|---|---|
| DDNS-GO | Dynamic DNS updates | Access home when IP changes | luci-app-ddns-go |
| FRP | NAT traversal via server | No public IP access | luci-app-frpc |
| DDNSTO | Web-based NAT traversal | Remote router management | luci-app-ddnsto |
-
4. Download & Multimedia
| Plugin | Description | Use Case | Package |
|---|---|---|---|
| Aria2 | HTTP/BT/magnet downloader | Offline downloads | luci-app-aria2 |
| Transmission | BitTorrent client | PT downloads | luci-app-transmission |
| miniDLNA | DLNA media server | Stream videos to TV | luci-app-minidlna |
| AirPlay 2 | AirPlay audio receiver | Wireless music to speakers | luci-app-airplay2 |
| KodExplorer | Web file manager | Private cloud storage | luci-app-kodexplorer |
-
5. File Sharing & Storage
| Plugin | Description | Use Case | Package |
|---|---|---|---|
| HD Idle | Auto spin-down hard drives | Extend drive life | luci-app-hd-idle |
| Disk Manager | SMART, partition, format | Manage external storage | luci-app-diskman |
| Aliyun WebDAV | Mount cloud drive as local | Stream from cloud | luci-app-aliyundrive-webdav |
-
6. Network Monitoring
| Plugin | Description | Use Case | Package |
|---|---|---|---|
| Bandwidth Monitor | Per-device traffic tracking | Find bandwidth hogs | luci-app-wrtbwmon |
| Wake-on-LAN | Remote power-on | Start office PC remotely | luci-app-wol |
| IP/MAC Binding | Static IP + ARP binding | Prevent IP conflicts | luci-app-arpbind |
| ServerChan | Push notifications to WeChat | Router status alerts | luci-app-serverchan |
-
7. System
| Plugin | Description | Use Case | Package |
|---|---|---|---|
| Bandwidth Monitor | Per-device traffic tracking | Find bandwidth hogs | luci-app-wrtbwmon |
| Wake-on-LAN | Remote power-on | Start office PC remotely | luci-app-wol |
| IP/MAC Binding | Static IP + ARP binding | Prevent IP conflicts | luci-app-arpbind |
| ServerChan | Push notifications to WeChat | Router status alerts | luci-app-serverchan |
ZeroTier
Setup Steps
-
Visit the official ZeroTier website (https://www.zerotier.com) and register for a Network ID.
-
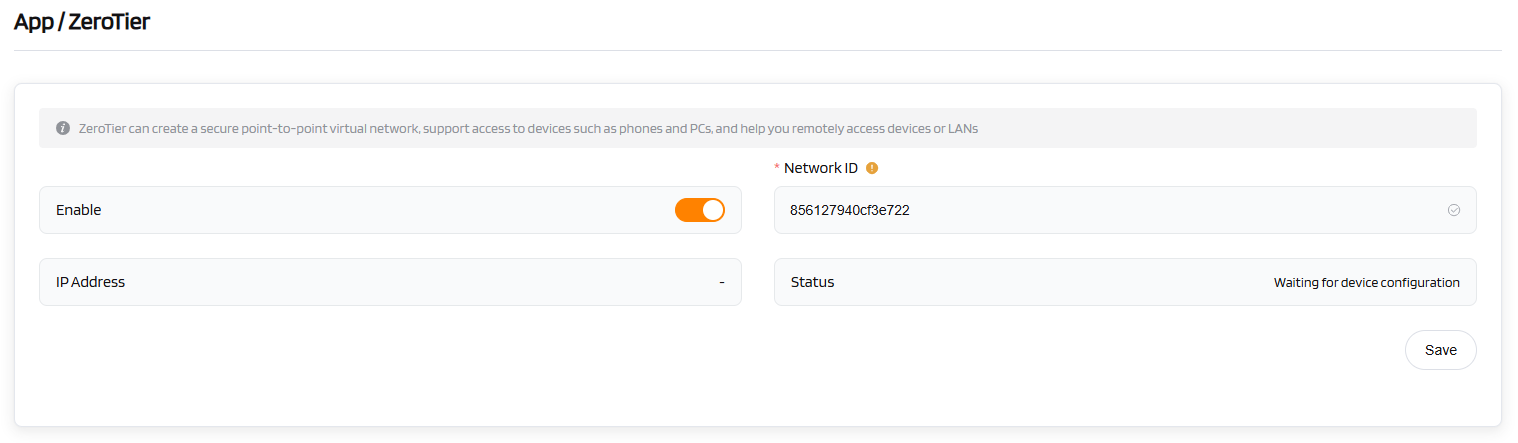
On the router's ZeroTier page, enter the Network ID you obtained.
-
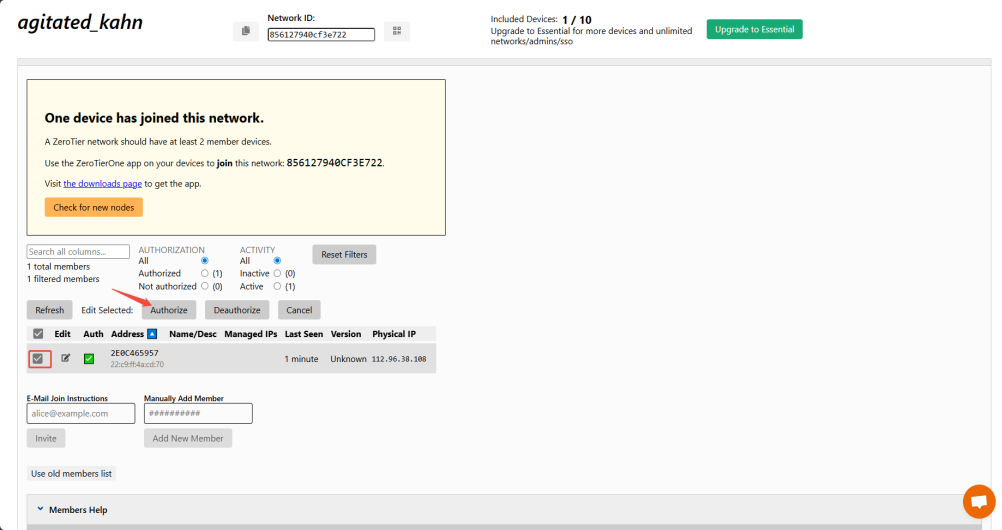
On the ZeroTier website, activate the router device and obtain its "Managed IPs".

-
Install the official ZeroTier client on your mobile phone or computer, enter the same Network ID, and follow the instructions to connect. This enables remote access to the router.
VPN
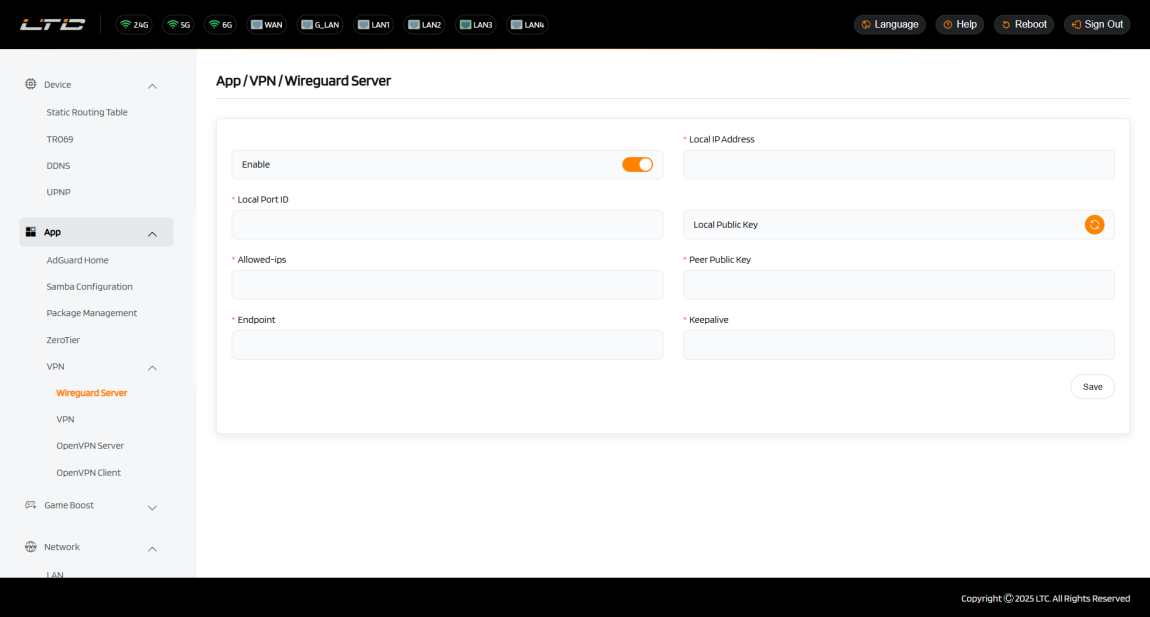
Wireguard Server
Server configuration
Follow these steps to configure and start the wireguard server.
-
In the Local IP Address field, enter the server's internal network IP address.
-
In the Local Port ID field, enter the port number used by the server for monitoring.
-
In the Local Public Key field, if no public key exists, click the button to generate the server's public key. This key is used for authentication and establishing a secure connection with clients.
-
In the Allowed-ips field, enter the range of IP addresses that clients are allowed to access.
-
In the Peer Public Key field, enter the client's public key. This key is used for authentication and establishing a secure connection with the server.
-
In the Endpoint field, enter the public IP address and port of the client that will connect to the server.
-
In the Keepalive field, enter the time interval (in seconds) for maintaining the connection (e.g., 25).
-
Enable WireGuard by turning on the switch. Since no local public key exists by default, you must click the Generate button to create one. This public key is essential for configuring the WireGuard client.
Starting the WireGuard Server
Click Start to activate the WireGuard server. Without starting the server, you cannot connect to it using the configuration file.
To verify if the WireGuard server is working correctly:
-
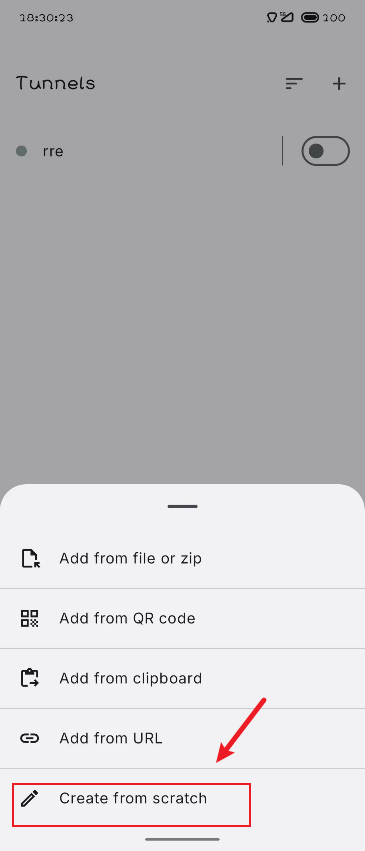
Install the official WireGuard client app on a smartphone.Download Link: Download WG Tunnel | WG Tunnel.

-
Disable the smartphone's Wi-Fi and connect to the Internet via 3G/4G/5G.
-
Create a key pair for the client, to be filled in on the router's server page.
-
Tap Create Manually.
-
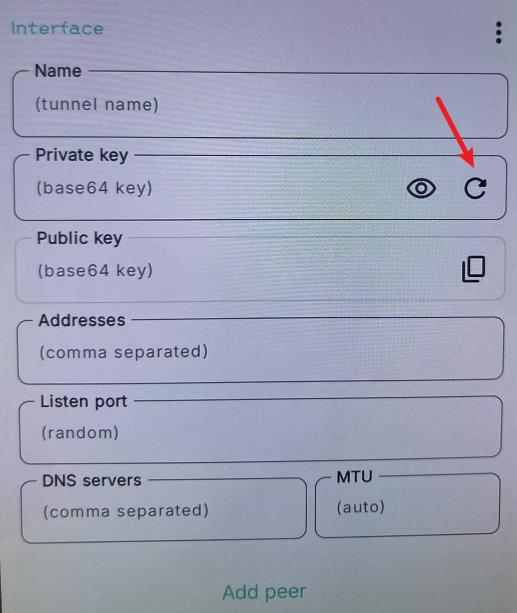
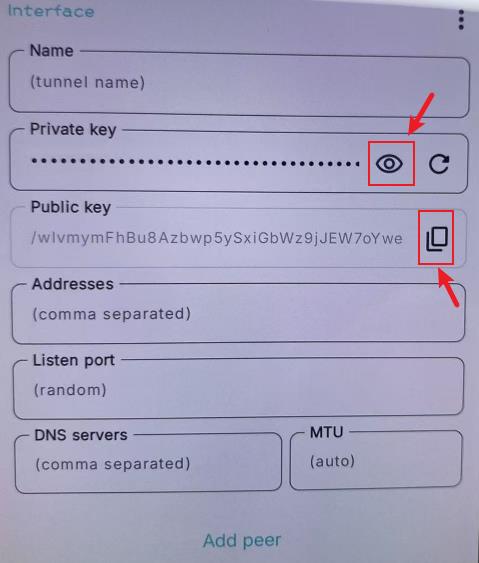
Tap the Generate button. Copy the resulting public key for router web configuration and private key for app client configuration.
-
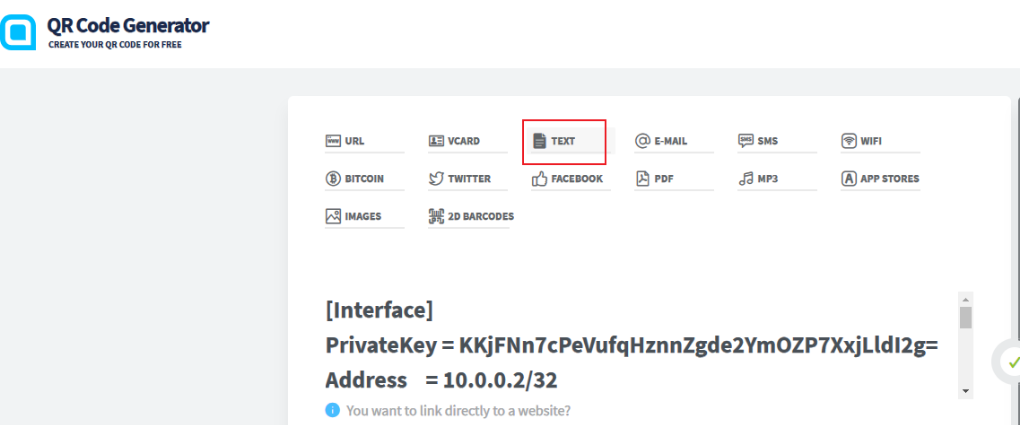
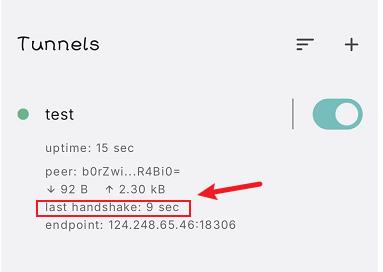
Generate a configuration QR code. The format is as follows:
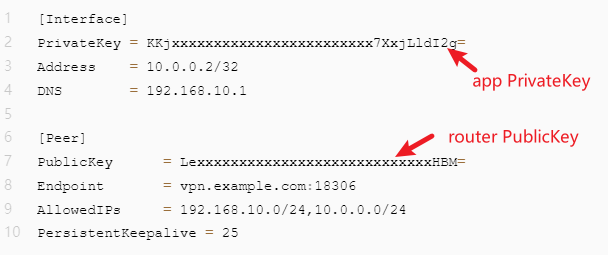
The endpoint is the same as the web UI configuration. The allowips is the subnet that this WireGuard client is allowed to access. Fill in the text according to the format below and generate a QR code from it: QR Code Generator
1
2
3
4
5
6
7
8
9
[Interface]
PrivateKey = KKjxxxxxxxxxxxxxxxxxxxxxxxx7XxjLldI2g=
Address = 10.0.0.2/32
DNS = 192.168.10.1
[Peer]
PublicKey = LexxxxxxxxxxxxxxxxxxxxxxxxxxxxHBM=
Endpoint = vpn.example.com:18306
AllowedIPs = 192.168.10.0/24,10.0.0.0/24
PersistentKeepalive = 25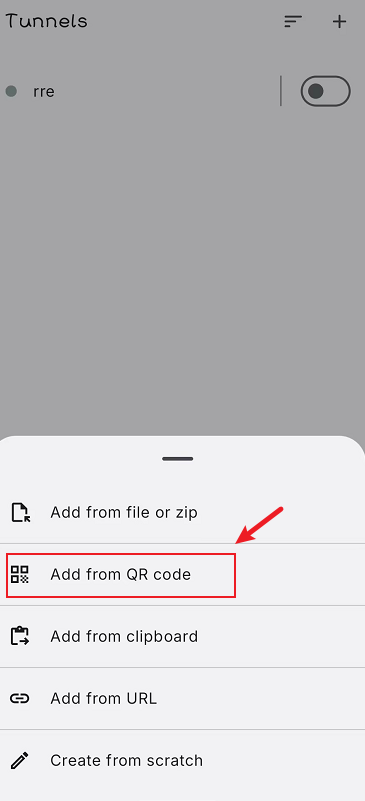
-
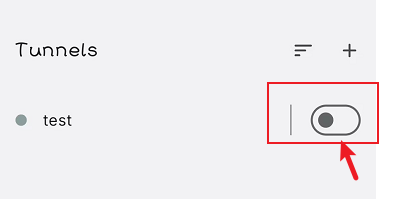
After importing the configuration, tap the Enable button.
-
Enable the connection and check if the smartphone has Internet access and if its IP address matches the WireGuard server's IP address.
| WireGuard Configuration | Configuration |
|---|---|
| Enable | [Toggle to enable] |
| *Local IP Address | [Enter the server's internal IP] |
| *Local Port ID | [Enter the server's monitoring port] |
| Local Public Key | [Generate or enter the server's public key] |
| *Allowed-ips | [Enter the allowed client IP range] |
| *Peer Public Key | [Enter the client's public key] |
| *Endpoint | [Enter the client's public IP and port] |
| *Keepalive | [Enter the connection keepalive interval] |
| Operation | Save |
VPN
The VL7M19K router’s VPN configuration supports two modes: L2TP and PPTP.
L2TP
Configuration
-
Toggle the Enable switch to activate the VPN service.
-
In the VPN Mode drop-down menu, select L2TP.
-
Toggle the NAT and Default Routing switches to enable these functions. This allows VPN clients to access the LAN and enables automatic traffic routing.
-
In the Server Address field, enter the public IP address or domain name of the VPN server.
-
In the Username and Password fields, enter the credentials provided by your VPN service provider.
-
In the MTU field, enter the maximum transmission unit size to optimize network performance.
Connecting to the VPN Server
Click Save to initiate the VPN connection. If the connection is successful, the page will display the VPN connection status, VPN local IP, and VPN peer IP.
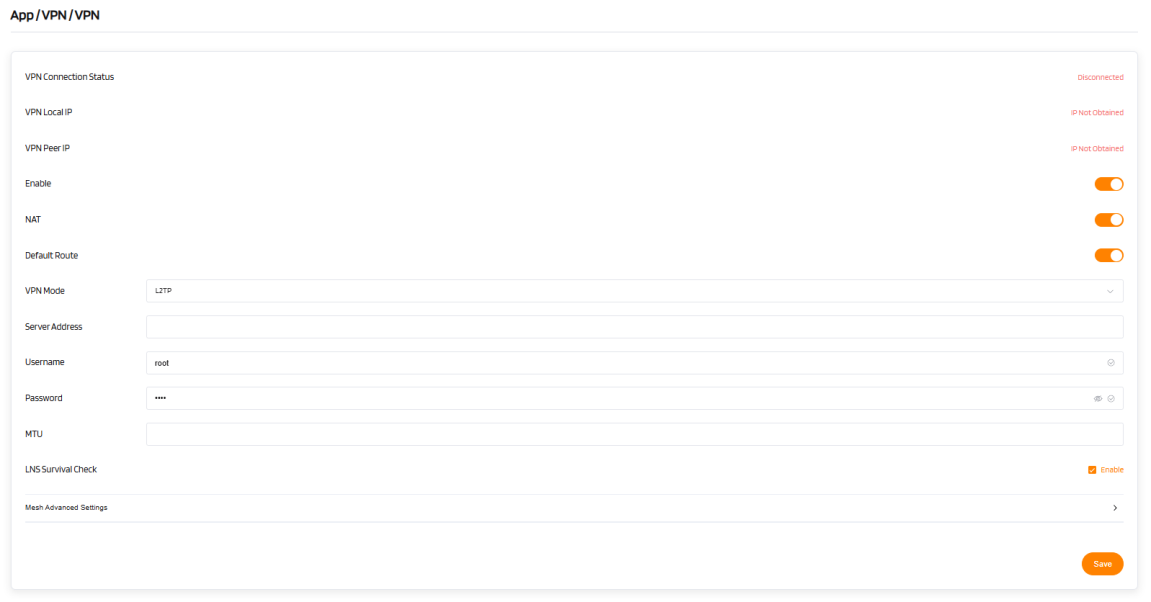
| VPN L2TP Mode | Configuration |
|---|---|
| VPN Connection Status | Disconnected (initial status) |
| VPN Local IP | IP Not Obtained (initial status) |
| VPN Peer IP | IP Not Obtained (initial status) |
| Enable | [Toggle to enable] |
| NAT | [Toggle to enable] |
| Default Route | [Toggle to enable] |
| VPN Mode | L2TP |
| Server Address | [Enter the VPN server's public IP or domain] |
| Username | [Enter the VPN username] |
| Password | [Enter the VPN password] |
| MTU | [Enter the MTU value] |
| LNS Survival Check | Enable |
| Advanced Settings | [Click to expand additional settings] |
| Operation | Save |
Warning
When hardware acceleration is enabled, the VPN function may not work properly.
PPTP
Configuration
-
Toggle the Enable switch to activate the VPN service.
-
In the VPN Mode drop-down menu, select PPTP.
-
Toggle the NAT and Default Routing switches to enable these functions. This allows VPN clients to access the LAN and enables automatic traffic routing.
-
In the Server Address field, enter the public IP address or domain name of the VPN server.
-
In the Username and Password fields, enter the credentials provided by your VPN service provider.
-
In the MTU field, enter the maximum transmission unit size to optimize network performance.
Connecting to the VPN Server
Click Save to initiate the VPN connection. If the connection is successful, the page will display the VPN connection status, VPN local IP, and VPN peer IP.
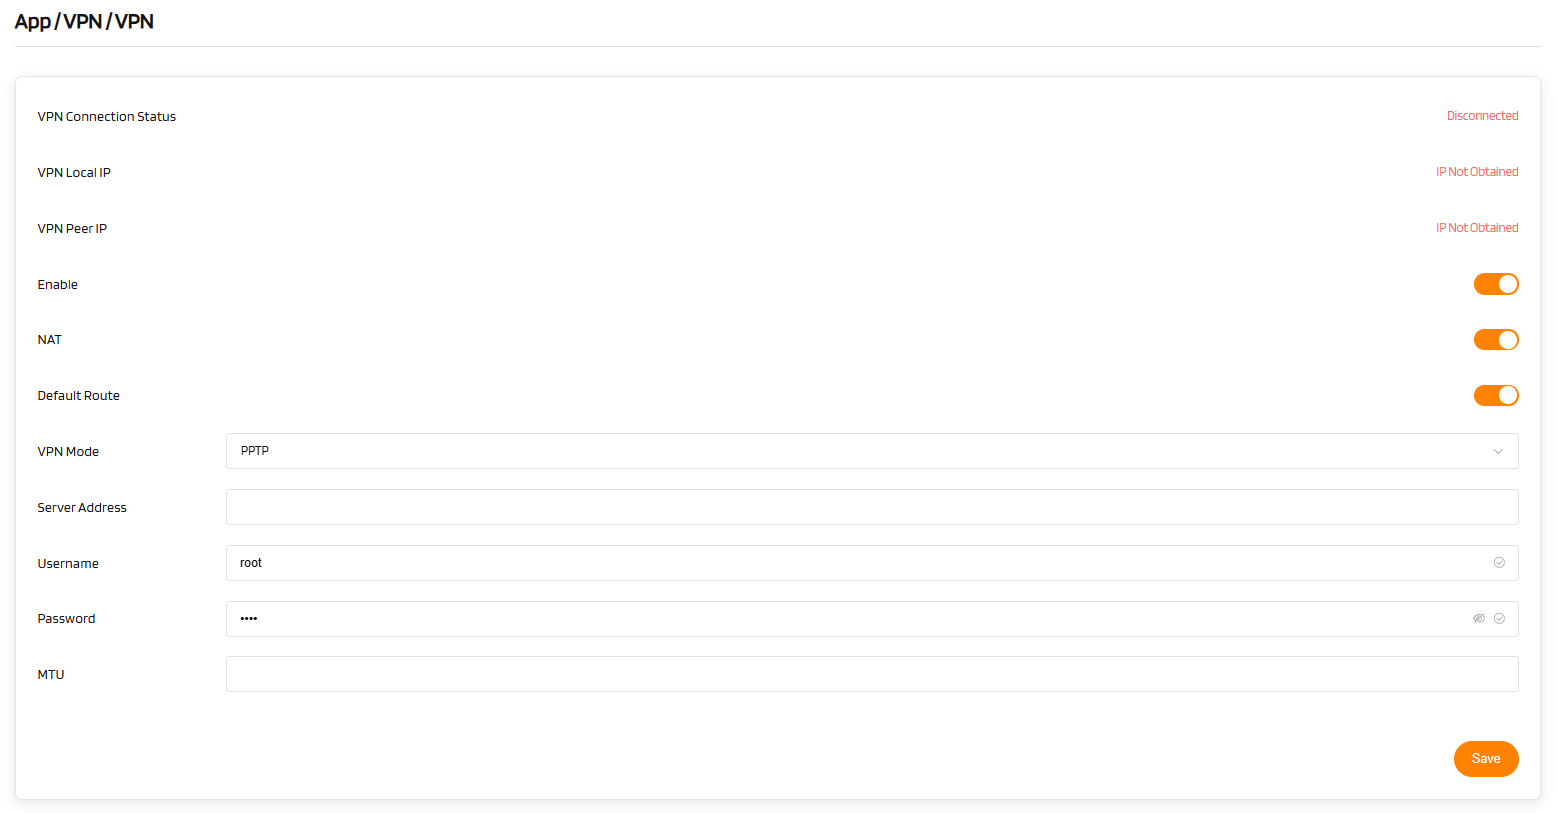
| VPN PPTP Mode | Configuration |
|---|---|
| VPN Connection Status | Disconnected (initial status) |
| VPN Local IP | IP Not Obtained (initial status) |
| VPN Peer IP | IP Not Obtained (initial status) |
| Enable | [Toggle to enable] |
| NAT | [Toggle to enable] |
| Default Route | [Toggle to enable] |
| VPN Mode | PPTP |
| Server Address | [Enter the VPN server's public IP or domain] |
| Username | [Enter the VPN username] |
| Password | [Enter the VPN password] |
| MTU | [Enter the MTU value] |
| Operation | Save |
Warning
When hardware acceleration is enabled, the VPN function may not work properly.
OpenVPN Serve
You can set up an OpenVPN server on the VL7M19K router. Click + Generate a configuration file to begin.
(1)Server Configuration
Preset OpenVPN server configurations are available. You can also click Modify to adjust settings manually. Click Apply when finished.
- Allow Access Local Network: Enabling this allows all clients connected to the OpenVPN Server to access your LAN. Use this feature with caution.
Warning
You cannot run the VPN Client and Server simultaneously. Additionally, you cannot run the OpenVPN Client and WireGuard Client at the same time.
(2)Exporting OpenVPN Configuration File
Click Export Config to download the OpenVPN configuration file, which you will need to upload when configuring your OpenVPN client.
(3)Starting the OpenVPN Server
Click Start to activate the OpenVPN server. Without starting the server, you cannot connect to it using the configuration file.
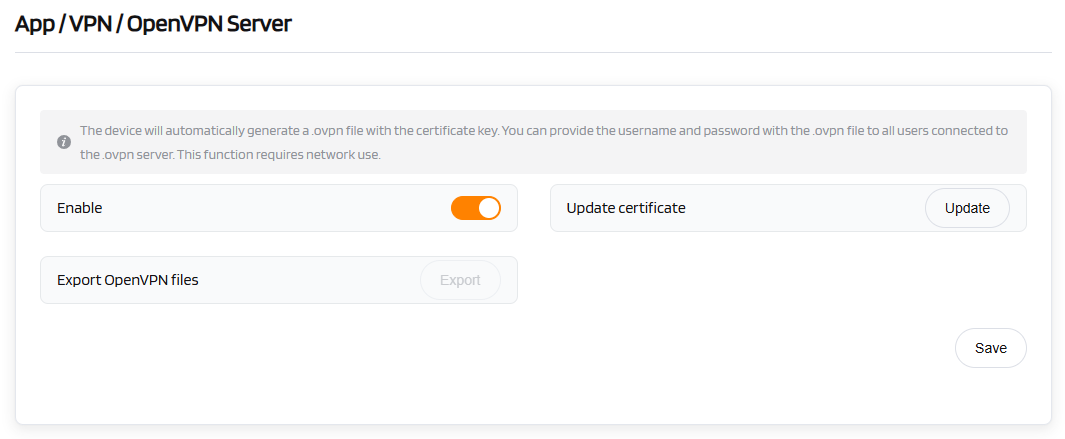
| OpenVPN Server | Configuration |
|---|---|
| Enable | [Toggle to enable] |
| Export OpenVPN Files | [Download the configuration file] |
| Operation | Save |
Tip
The device automatically generates a configuration file. If you need to set a username and password for the OpenVPN server, include them with the .ovpn file and distribute them to all users who need to connect. This function requires network connectivity.
OpenVPN Client
The OpenVPN client requires an OpenVPN configuration file (.ovpn) to establish a connection. If you have a VPN service provider but do not know how to obtain the configuration file, refer to the "Obtaining Your Configuration File" section below. Click + Add a New VPN Configuration to upload the configuration file.
(1)Uploading Your OpenVPN Configuration File
Drag and drop the file into the pop-up window. You can upload a single .ovpn file or a compressed zip/tar.gz file containing multiple .ovpn files.
Note
Some .ovpn files require separate ca, cert, or crl files. These files must be zipped together with the .ovpn file before upload.
(2)Entering Description, Username, and Password
Enter a description for your OpenVPN configuration file, then click Submit to complete the upload. In some cases, you may be prompted to enter your VPN username and password.
(3)Connecting to the OpenVPN Server
Click Connect to start the OpenVPN connection.
If your configuration file is a compressed archive (e.g., .zip), you can switch between servers using the cog icon.
Once connected, you can view your IP address and data transfer statistics (received/sent).
Warning
You cannot run the VPN Client and Server simultaneously. Additionally, you cannot run the OpenVPN Client and WireGuard Client at the same time.
(4)Managing Configuration Files
Click Management to view the list of configuration files. You can modify the description, username, or password for each file. You can also add, delete, or delete all uploaded configuration files.
If your configuration file is a zip/tar.gz file containing multiple .ovpn files, you can select an individual .ovpn file to connect to in the Server section.
(5)Obtaining Your Configuration File
We have tested various VPN service providers. If you do not know how to obtain the configuration file, follow the instructions below. If your service provider is not listed, contact them directly for the configuration file.
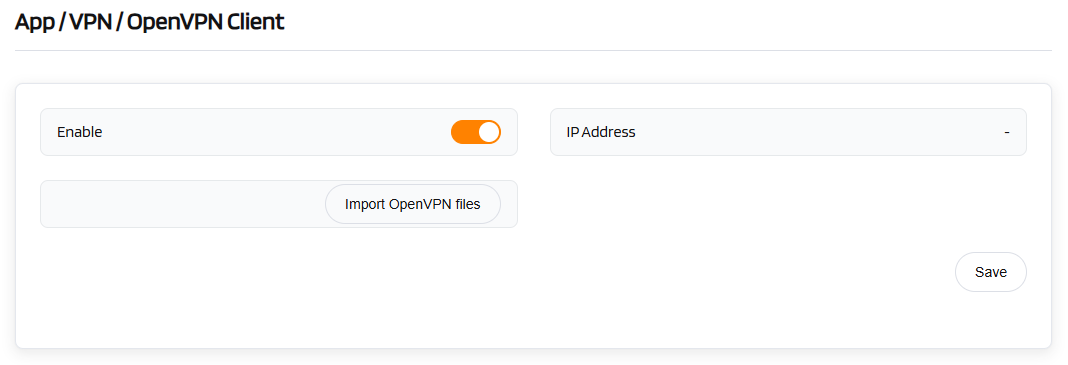
| OpenVPN Client | Configuration |
|---|---|
| Enable | [Toggle to enable] |
| Import OpenVPN Files | [Upload the configuration file] |
| Operation | Save |