Network
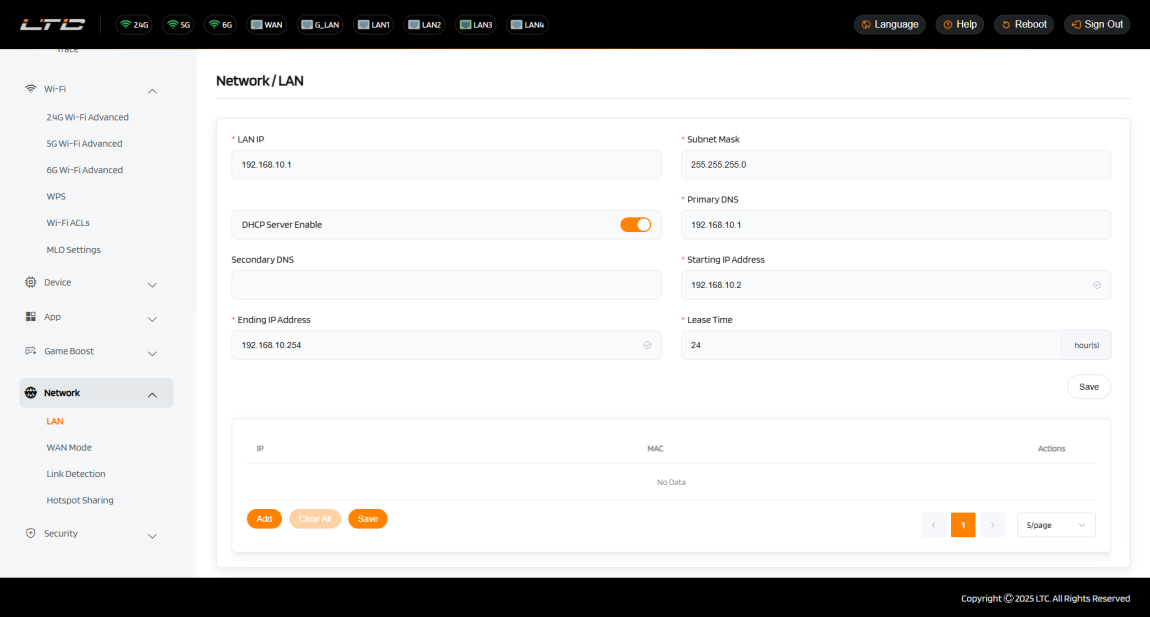
LAN
DHCP Mode
- LAN IP: The router's local management address (e.g., 192.168.10.1).
- Subnet Mask: Divides an IP address into a network part and a host part(e.g., 255.255.255.0).
- Primary DNS: The preferred Domain Name System server used to resolve domain names into IP addresses (e.g., 192.168.10.1).
- Secondary DNS: The alternative Domain Name System server used to resolve domain names into IP addresses if the primary DNS is unavailable. (e.g., 8.8.8.8).
- IP Address Pool: The range of IP addresses available for DHCP assignment(e.g., 192.168.1.100 to 192.168.1.200).
- Lease Time: The duration for which an assigned IP address remains valid(e.g., 24 hours).
IP Address Reservation
This DHCP server feature assigns a fixed IP address to a specific device (identifiedby its MAC address), ensuring the device consistently obtains the same IP upon connecting to the network. It is commonly used for devices requiring persistent addresses, such as servers or NAS system .

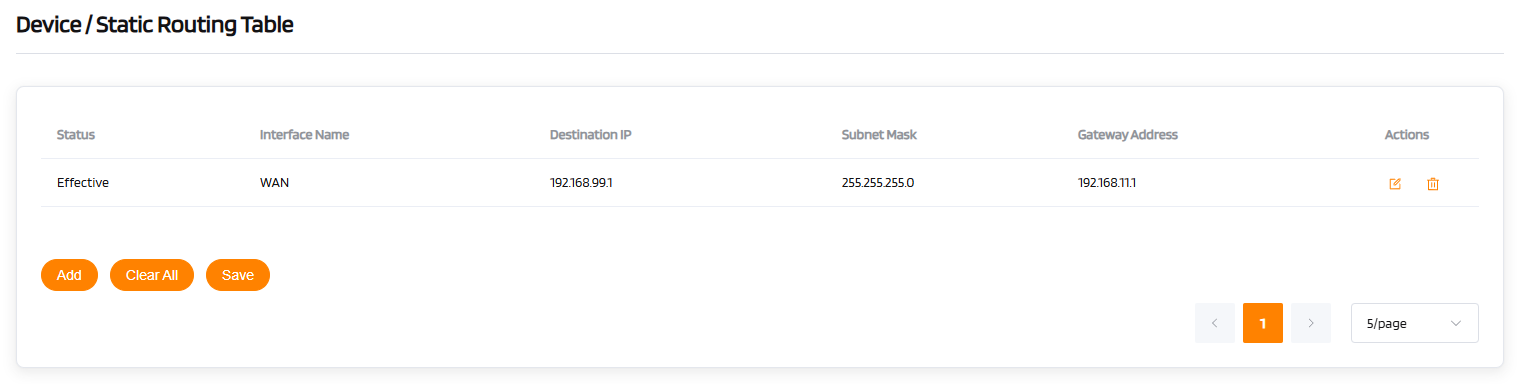
Static Routing Table
The static routing function allows manual configuration of routing rules (interface name, destination IP, subnet mask, gateway address) to forcibly direct traffic for specific networks. It is suitable for multi-segment network communication or special path control.
- Interface Name: The physical/logical interface for data outflow (e.g.,WAN/LAN)
- Destination IP/Subnet Mask: Defines the target network segment.
- Gateway Address: The IP address of the next-hop router(e.g.,192.168.10.1).
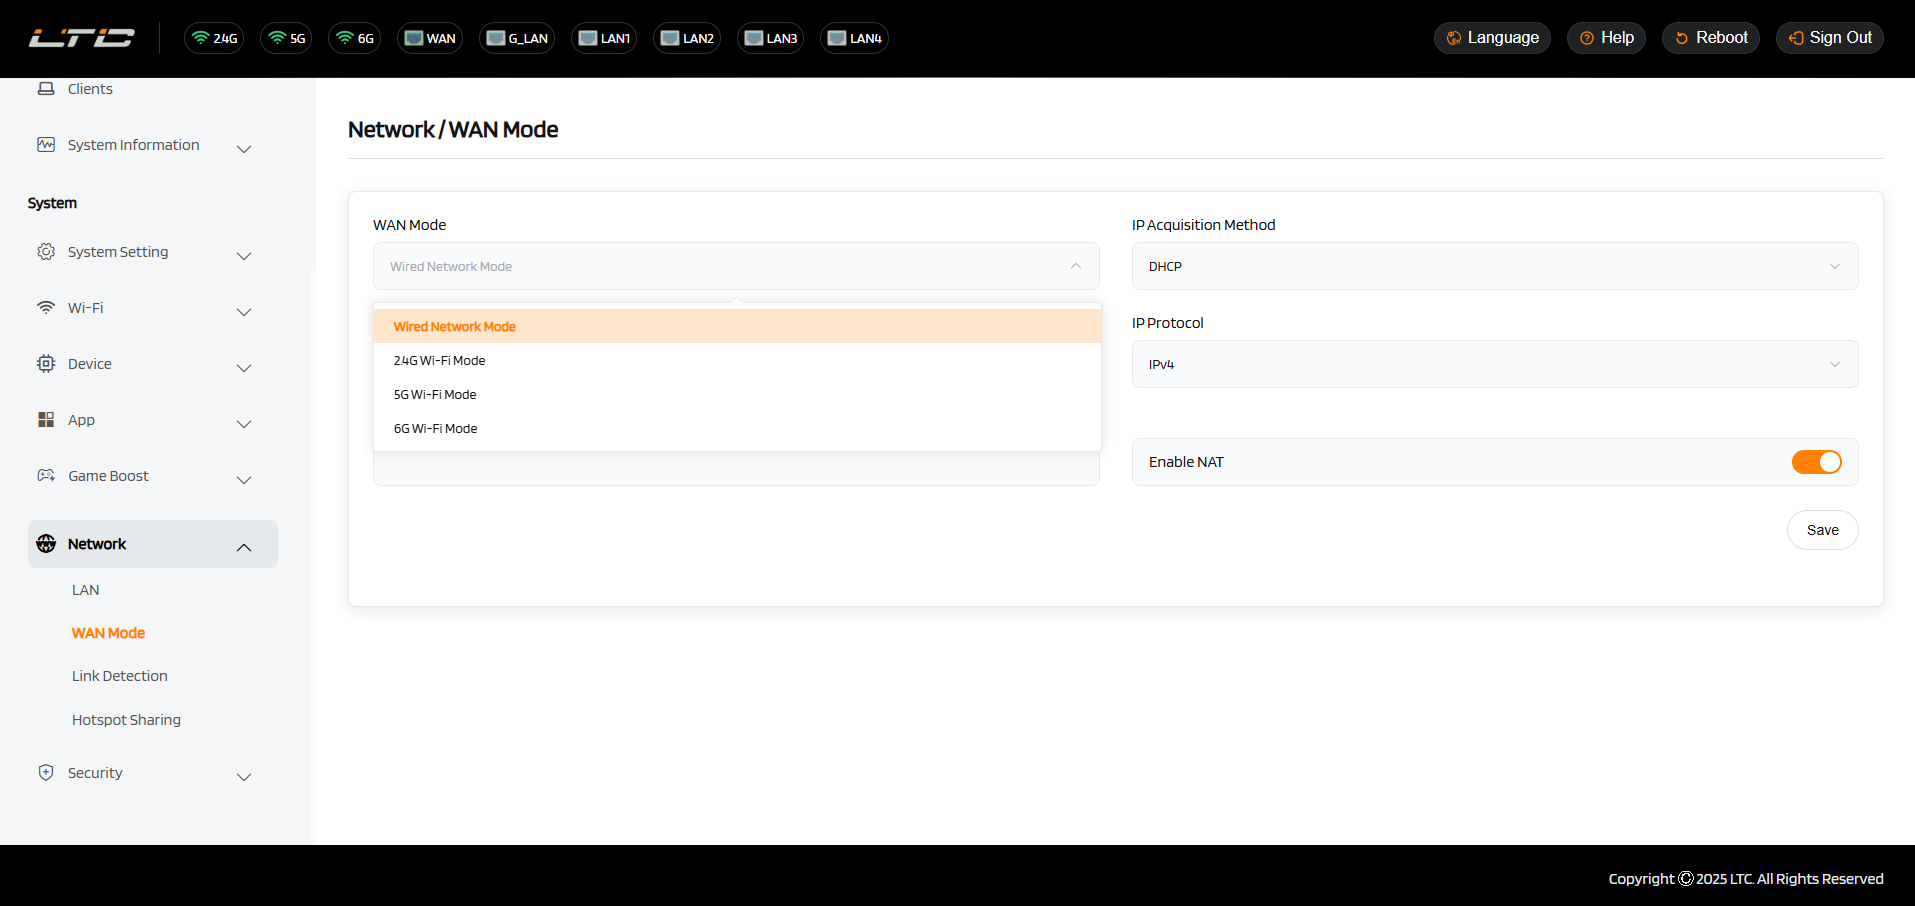
WAN Mode
There are total two types of the connection mode that you can use to access the Internet netowrk: Wired Network Mode and Repeater mode(2.4 GHz Wi-Fi Mode, 5 GHz Wi-Fi Mode and 6 GHz Wi-Fi Mode).
Wired NetWork
Connect the router to the upstream gateway with Internet access via Ethernet cable to access the Internet.
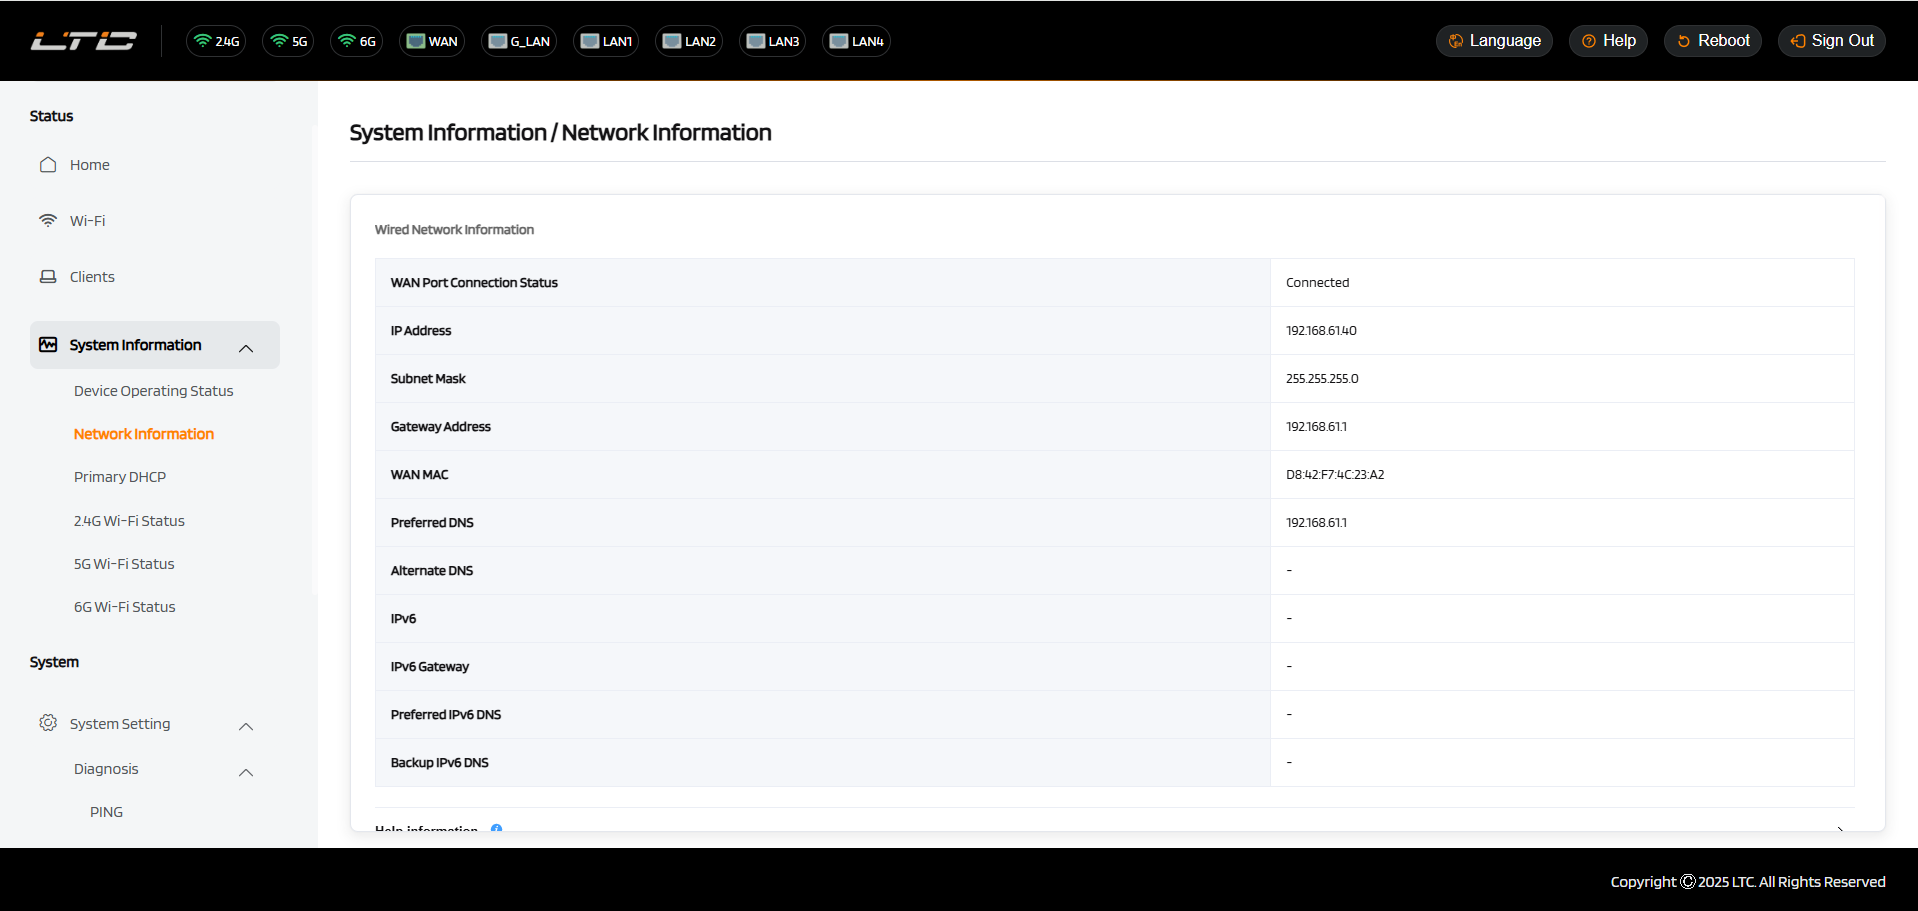
Plug the Ethernet cable into the WAN port of the router. The information of your connection will be shown on the System Status page. DHCP is the default protocol. You can change the protocol in the Network page.
DHCP
DHCP is the default and most common protocol. It doesn't require any manual configuration.

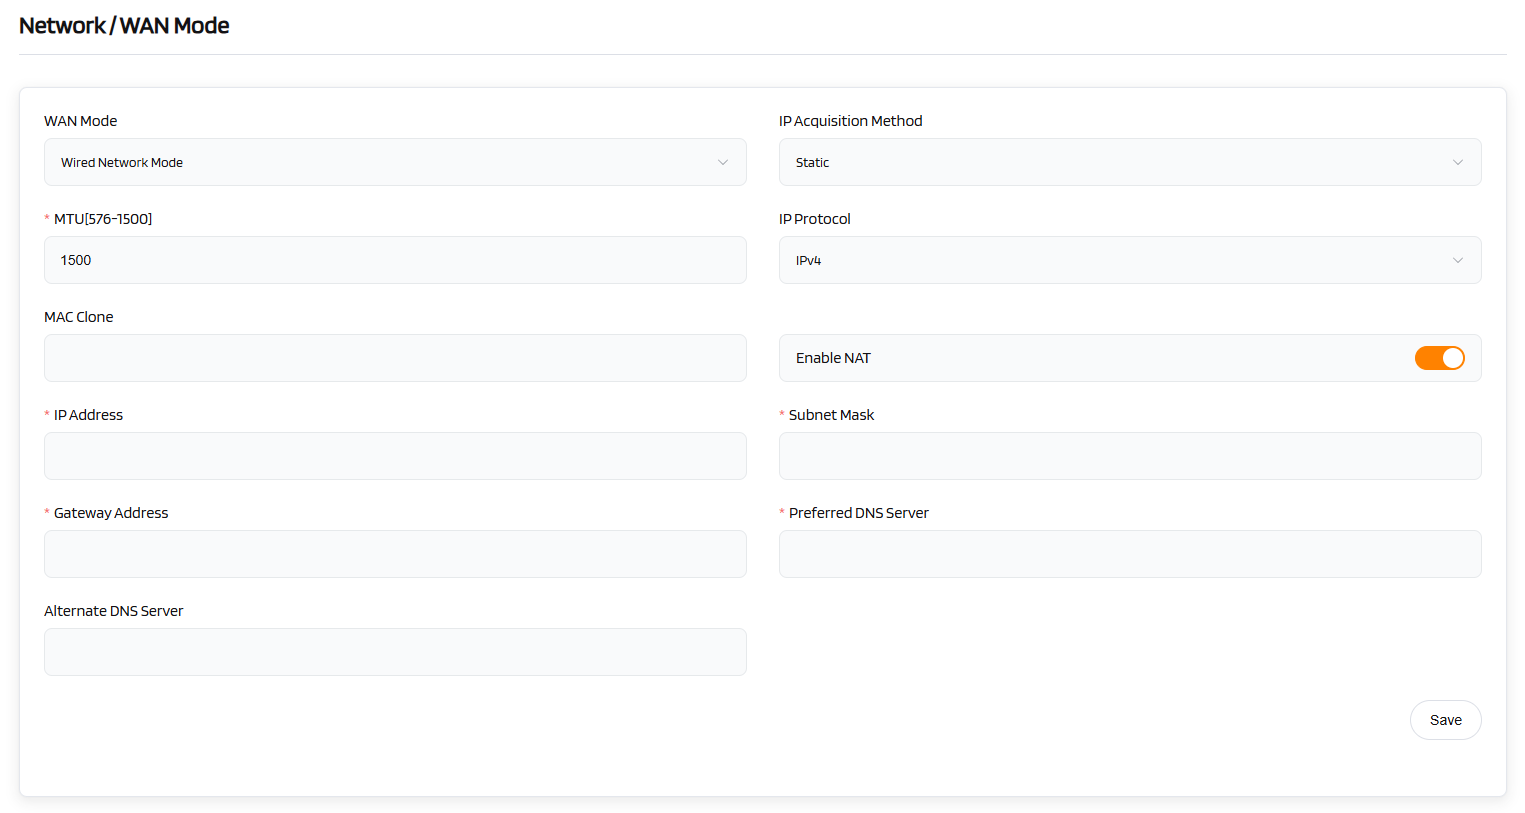
Static
Static is required if your Internet Service Provider (ISP) has provided a fixed IP address for you or you want to configure the network information such as IP address, Gateway, Netmask manually.
The current settings will be change once you choose Static. Change it according to your needs and then click Save.
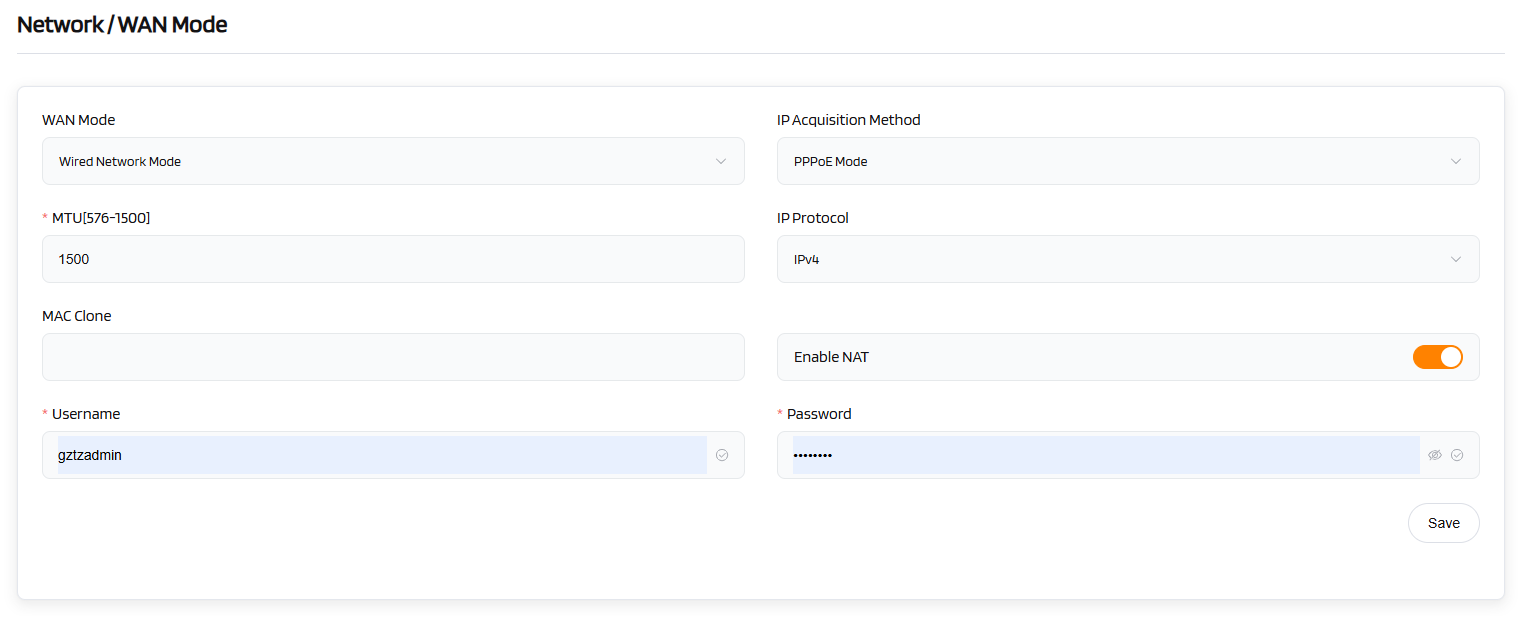
PPPoE Mode
PPPoE is required by many Internet Service Providers (ISP). Generally, your ISP will give you a modem and provide you a username & password that you needed when you are creating the Internet connection.
Under PPPoE protocol, enter your username and password, then click Save.
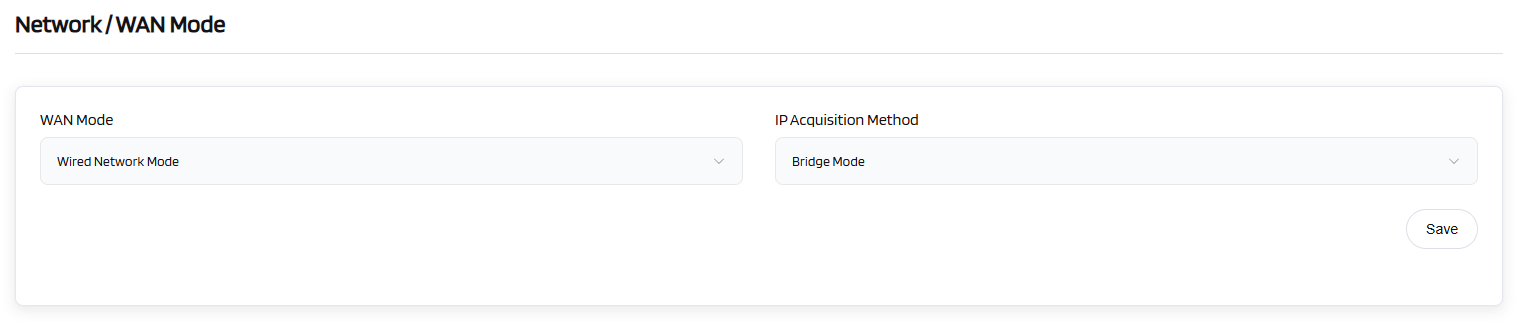
Bridge Mode
Bridge Mode can achieve network expansion. In this mode, the secondary router acts as an extension of the primary router's network, enhancing the signal coverage area, and enabling stable and high-speed interconnection between different devices.
Under Bridge Mode, you only need to click Save.
Repeater
Using Repeater means connectingthe router to another existing wireless network, e.g. whenyouareusingfreeWi-Fiinahotelorcafe.
It works in WISP (Wireless Internet Service Provider) mode by default, which means that the router will create its own subnet and act as a firewall to protect you from the public network.
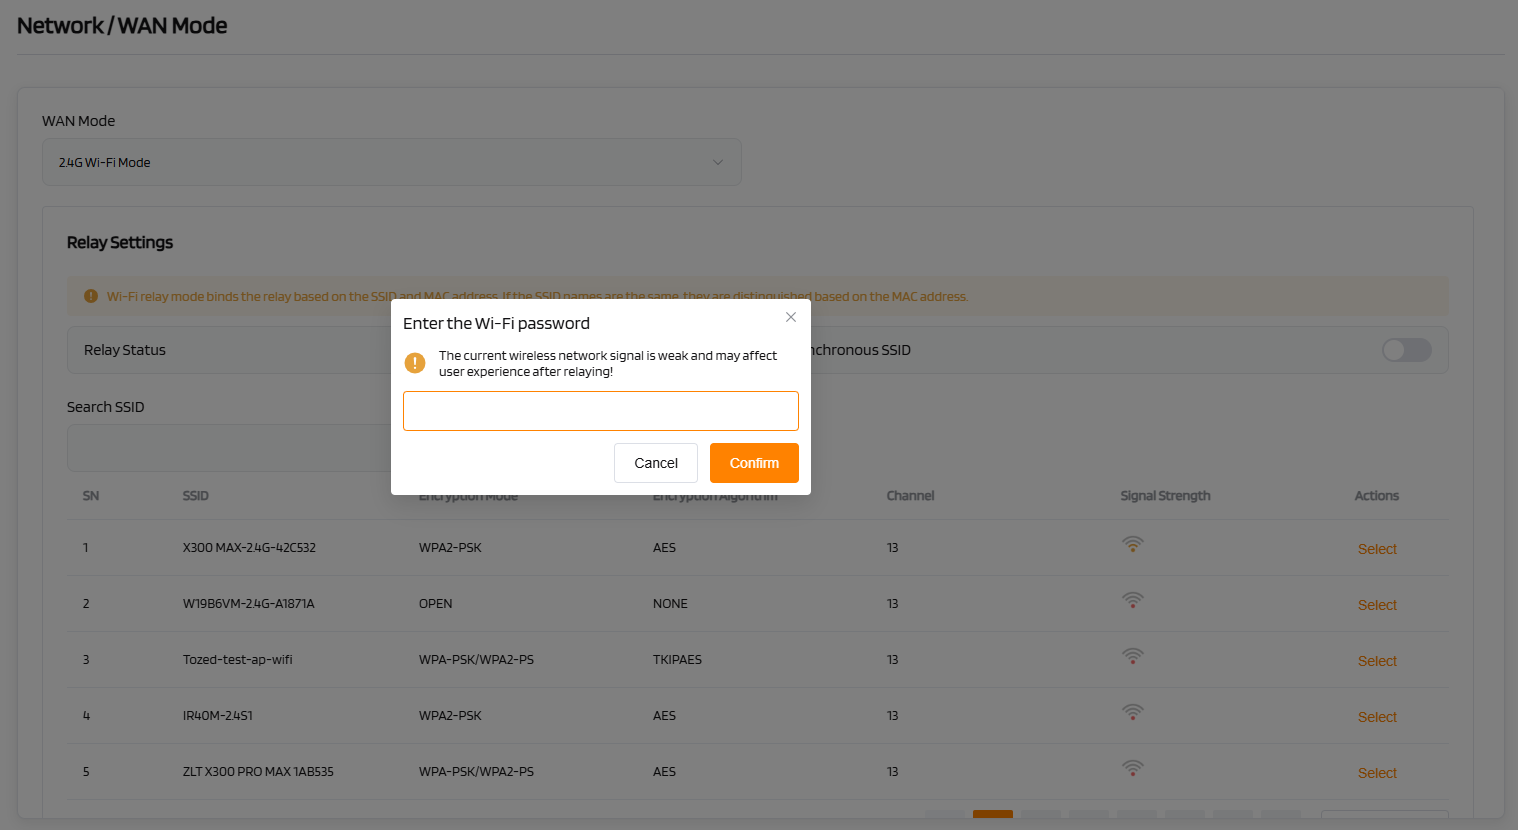
(1) 2.4 GHz Wi-Fi Mode
In Network section, choose 2.4 GHz Wi-Fi Mode and click Save.
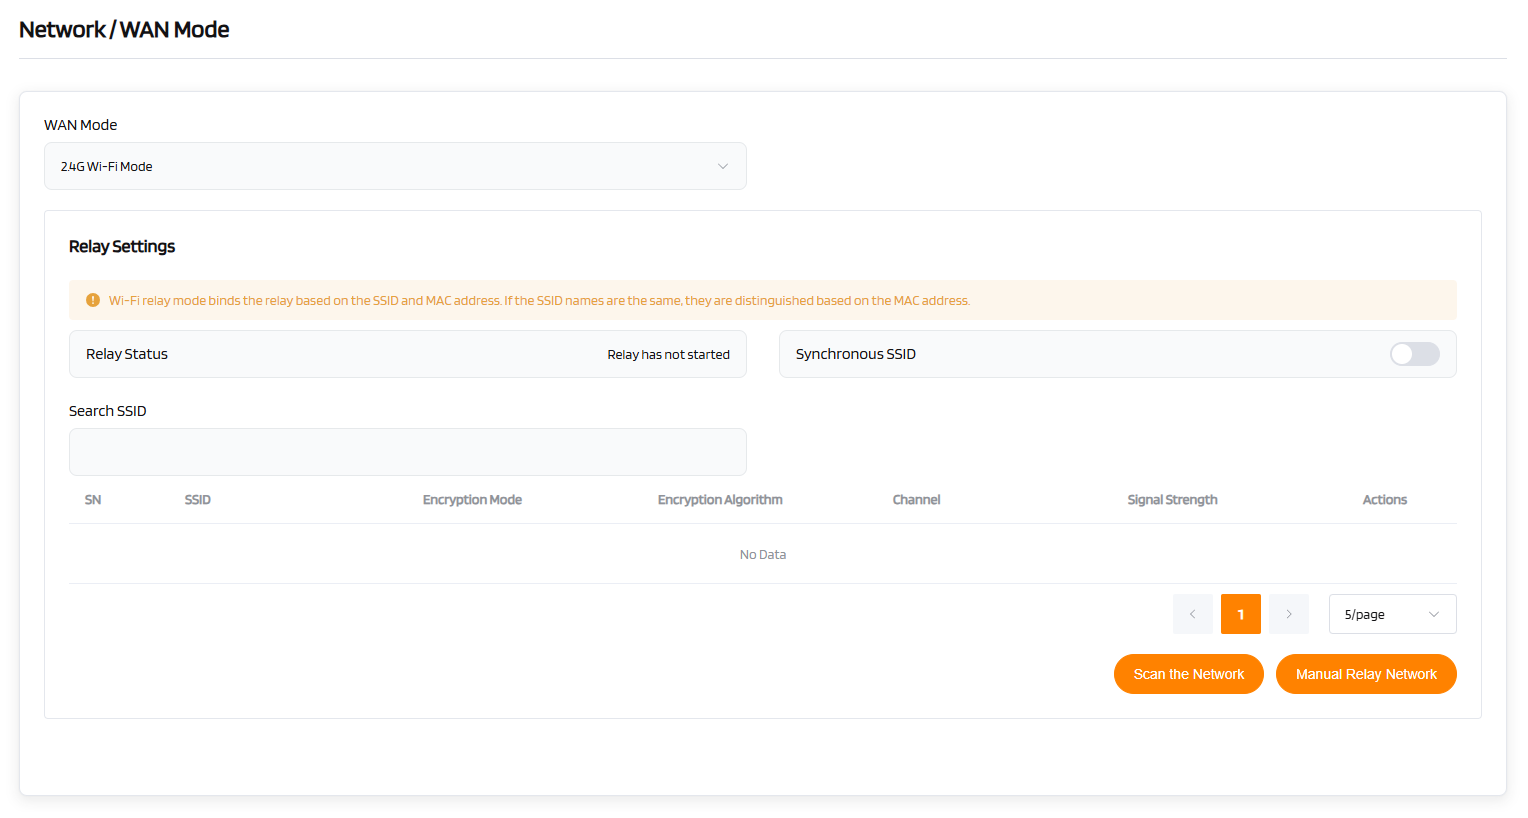
Click Scan the Network to search for the available wireless networks nearby.
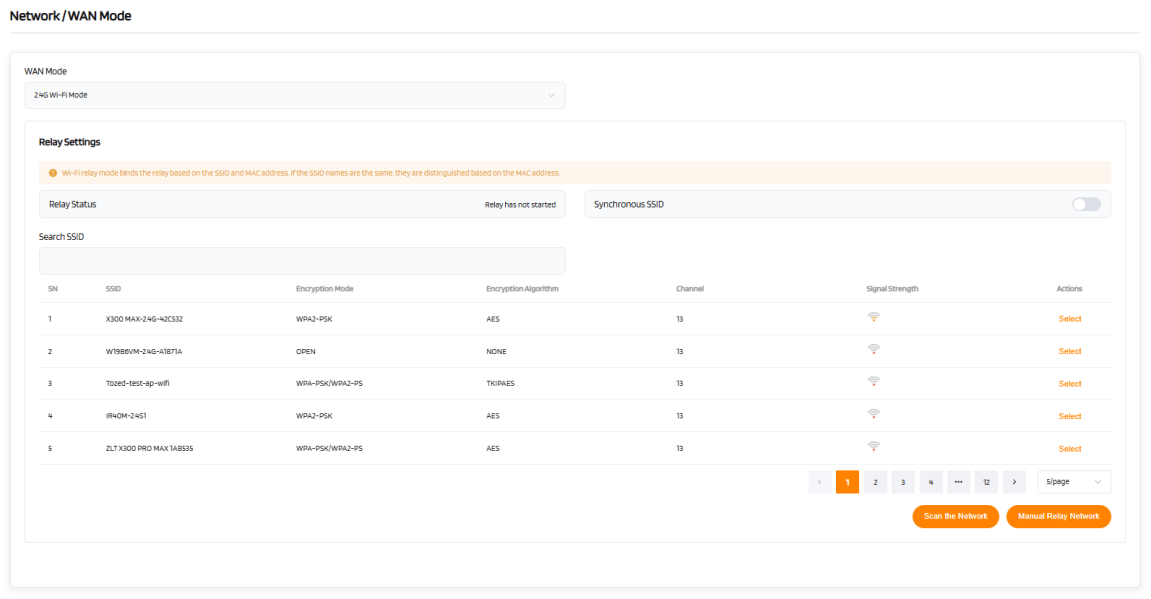
Choose a SSID from the list and enter its password. Finally,click Confirm.
(2) 5 GHz Wi-Fi Mode
Refer to the operation steps for the 2.4 GHz Wi-Fi Modebridging mode.
(3) 6 GHz Wi-Fi Mode
Refer to the operation steps for the 2.4 GHz Wi-Fi Modebridging mode.
Link Detection
| Category | Status | Description |
|---|---|---|
| POWER | Green (Always on) | Power on. |
| Orange flashing slowly | When the restart button is pressed for 5 seconds. | |
| Light off | NO Power. | |
| STATUS | Green (Always on) | Connecting to the Internet. |
| Red flashing | During firmware update. | |
| Light off | Not connected to the Internet. | |
| 2.4 GHz Wi-Fi | Green (Always on) | 2.4 GHz Wi-Fi is enabled. |
| Light off | 2.4 GHz Wi-Fi is disabled. | |
| 5 GHz Wi-Fi | Green (Always on) | 5 GHz Wi-Fi is enabled. |
| Light off | 5 GHz Wi-Fi is disabled. | |
| 6 GHz Wi-Fi | Green (Always on) | 6 GHz Wi-Fi is enabled. |
| Light off | 6 GHz Wi-Fi is disabled. | |
| WPS/MESH | Green (Always on) | Mesh network successfully established. |
| Green slow flashing | Mesh scanning (One Flash Per Second). | |
| Green quick flashing | Activate 5 GHz WPS (Two Flashes Per Second). | |
| Green rapid flashing | Activate 2.4 GHz WPS (Five Flashes Per Second). | |
| Light off | Mesh disabled. | |
| STORAGE | Green (Always on) | USB device mounted successfully. |
| Light off | No USB device mounted. |

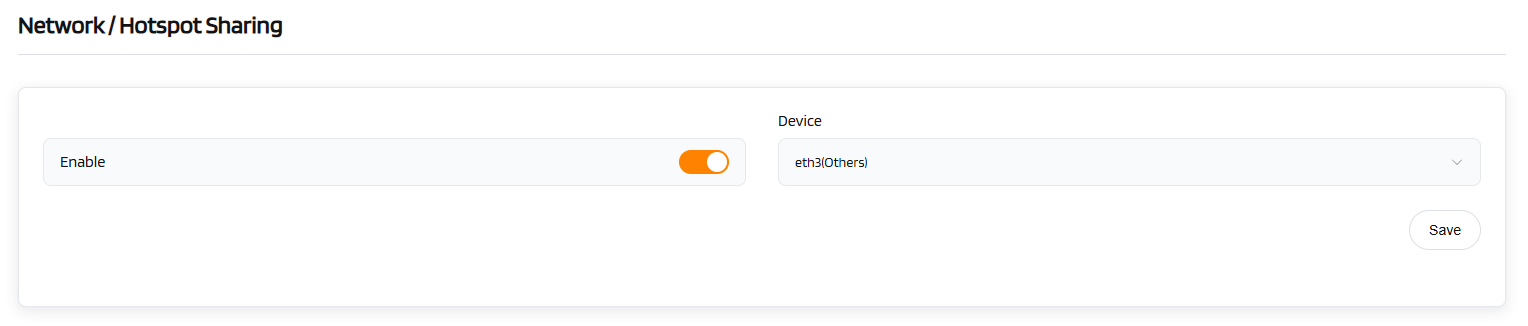
Hotspot Sharing
The VL7M19K router supports USB internet sharing, allowing the router to function as a hotspot amplifier for devices such as smartphones, MiFis, or dongles. For example, when using a smartphone, follow these steps:
- Enable USB tethering on the smartphone.
- Connect the smartphone to the router’s USB port via a USB data cable.
- Once the USB device is detected, the router will automatically identify the device information (e.g., "eth3" as shown in the figure below).
- Click "Save". After a few seconds, the router will successfully share the hotspot network.