Samba Configuration
The VL7M19K router supports external storage devices (e.g., USB drives, MicroSD cards). Connected devices can share and access the contents of the external storage, allowing easy reading and modification of files.
| Samba Configuration | Configuration |
|---|---|
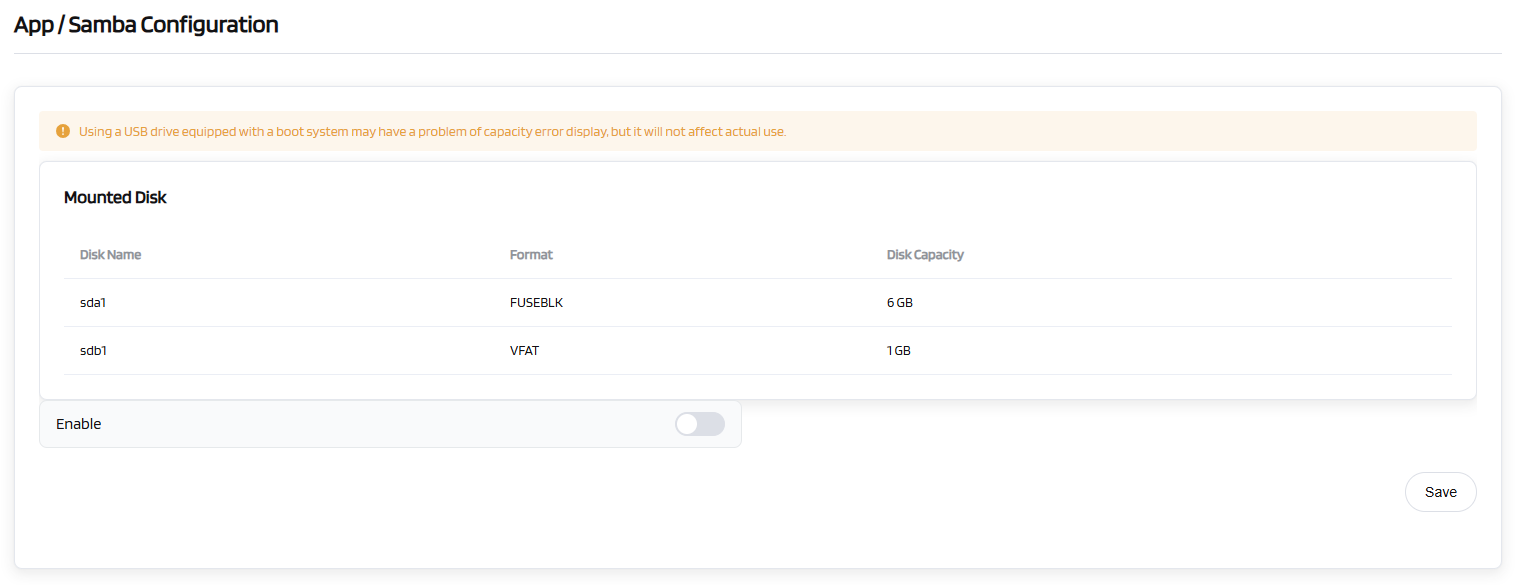
| Mounted Disk | [Displays details of connected storage: Disk Name / Format / Disk Capacity] |
| Enable | [Toggle to enable network storage sharing] |
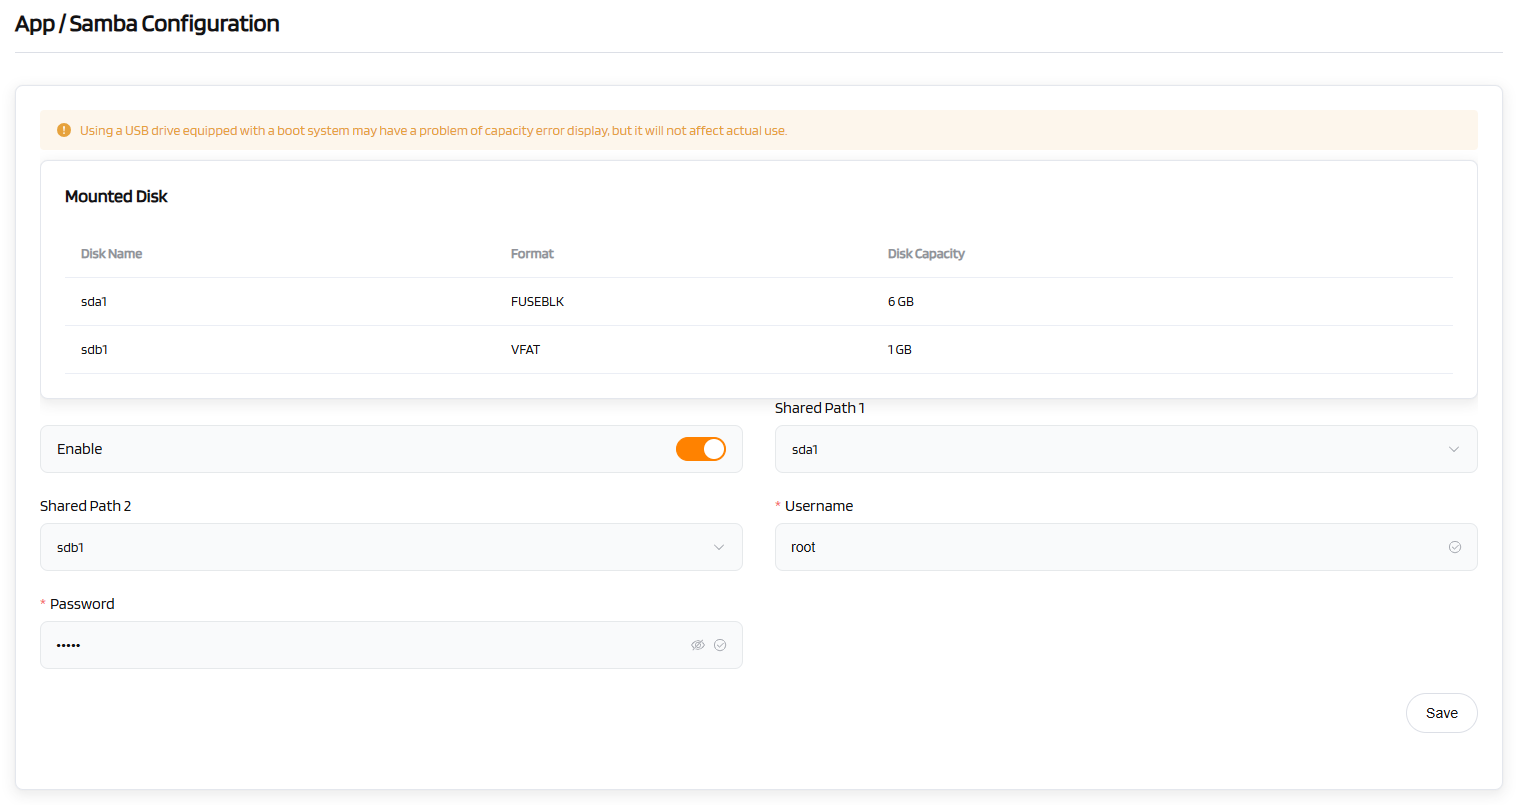
| Shared Path 1 | [Select the first shared directory] |
| Shared Path 2 | [Select the second shared directory] |
| *Username | [Set a username for accessing the shared storage] |
| *Password | [Set a password for accessing the shared storage] |
| Operation | Save |
Steps:
- Insert your USB drive into the router's USB 3.0/2.0 port. Please ensure the drive uses a common readable and writable format.
- Connect to the router's network via a wired or wireless connection. Open a web browser, log in to the router's management page, and navigate to "APP" ->"Network Storage" -> "Samba Configuration". If the guide path is incorrect, you can use the search bar in the upper-right corner to find "Samba" and access the settings page. Once the USB drive is correctly recognized, the interface should resemble the following screenshot:
- Click the "Enable" button to activate the Samba function. Fill in the required information as prompted on the page:
Shared Path 1: Select the partition of the external USB drive to serve as the storage address for the Samba function.
Shared Path 2: The secondary USB interface (for an alternate drive)
Username: Set the account username for accessing the Samba share.
Password: Set the password for the Samba function, as shown in the screenshot.
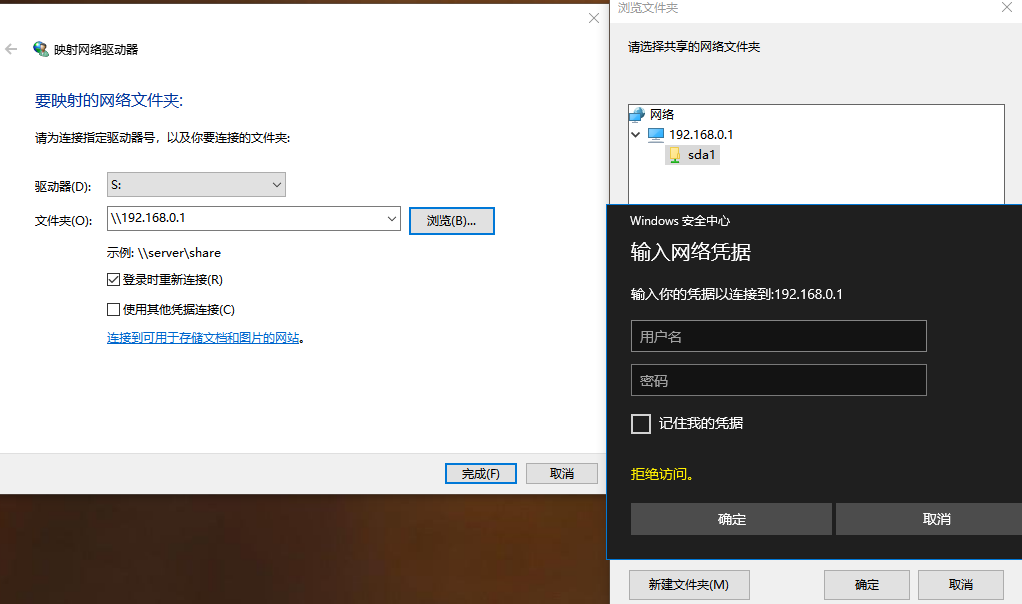
- To begin, ensure a PC is available. Open File Explorer by pressing Windows Key+ E, and verify that File Explorer is active.
- In the left navigation pane, right-click on "Computer" or "This PC," then select "Map Network Drive" from the context menu.
- Select an available drive letter (e.g., S) from the "Drive" dropdown menu.
- Enter the router’s administrative address as the folder path. For instance, the default address is: "\192.168.0.1".
- Click "Browse" and navigate to the address "\192.168.0.1". Select the Samba partition name displayed in the web interface, then enter the Samba username and password. The USB drive is now ready for read and write operations.
Tip
USB hard drives consume significant power. Use an external power supply for USB hard drives; otherwise, the device may malfunction.