WireGuard
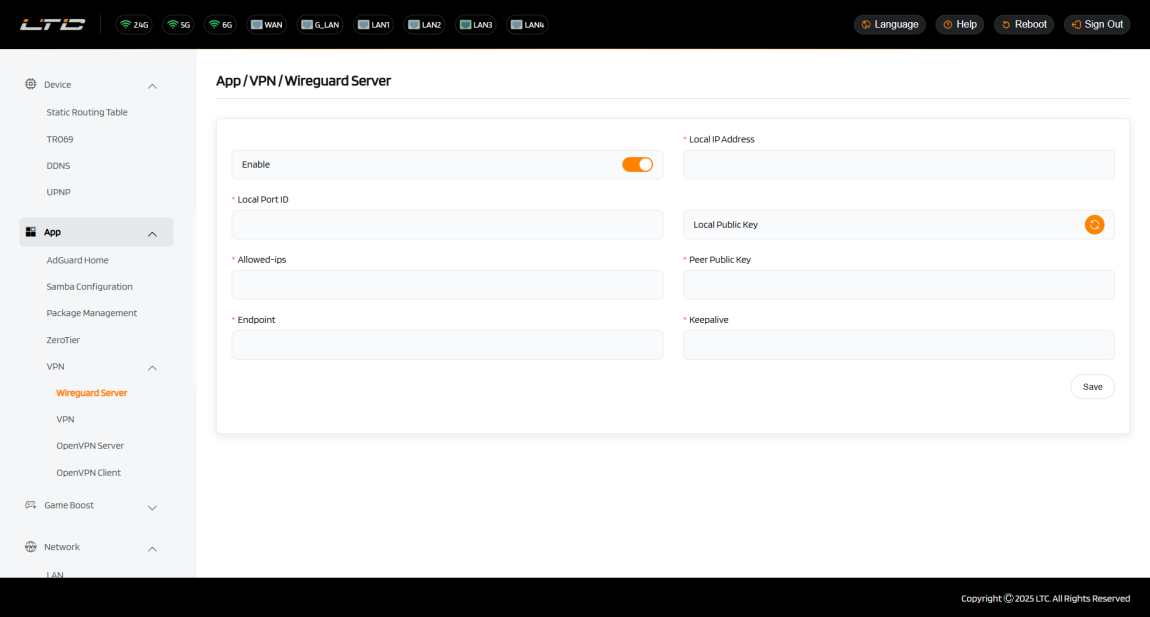
Server configuration
Follow these steps to configure and start the wireguard server.
-
In the Local IP Address field, enter the server's internal network IP address.
-
In the Local Port ID field, enter the port number used by the server for monitoring.
-
In the Local Public Key field, if no public key exists, click the button to generate the server's public key. This key is used for authentication and establishing a secure connection with clients.
-
In the Allowed-ips field, enter the range of IP addresses that clients are allowed to access.
-
In the Peer Public Key field, enter the client's public key. This key is used for authentication and establishing a secure connection with the server.
-
In the Endpoint field, enter the public IP address and port of the client that will connect to the server.
-
In the Keepalive field, enter the time interval (in seconds) for maintaining the connection (e.g., 25).
-
Enable WireGuard by turning on the switch. Since no local public key exists by default, you must click the Generate button to create one. This public key is essential for configuring the WireGuard client.
Starting the WireGuard Server
Click Start to activate the WireGuard server. Without starting the server, you cannot connect to it using the configuration file.
To verify if the WireGuard server is working correctly:
-
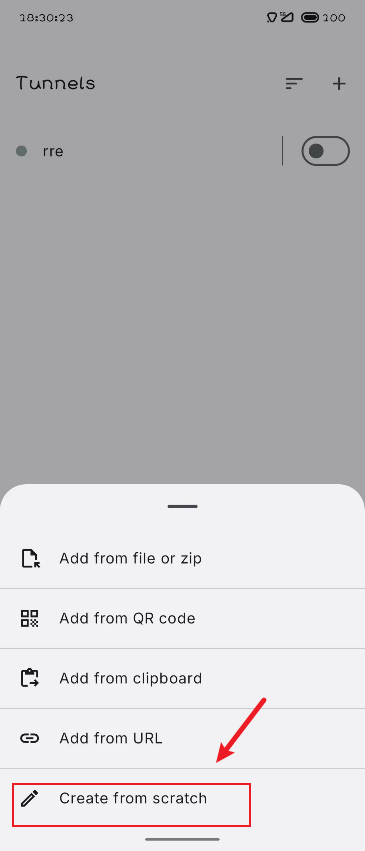
Install the official WireGuard client app on a smartphone.Download Link:

-
Disable the smartphone's Wi-Fi and connect to the Internet via 3G/4G/5G.
-
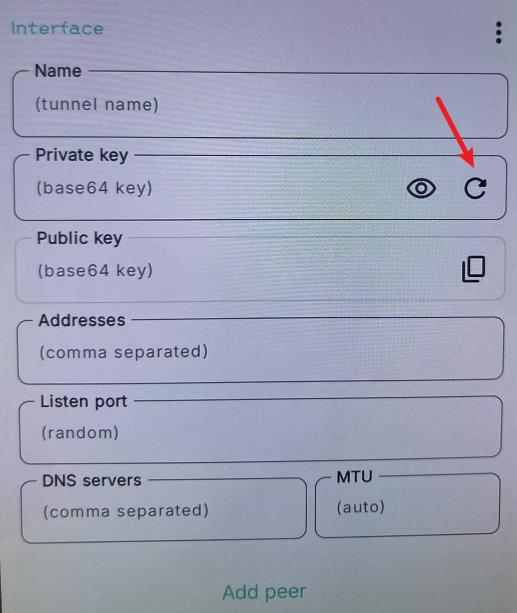
Create a key pair for the client, to be filled in on the router's server page.
-
Tap Create Manually.
-
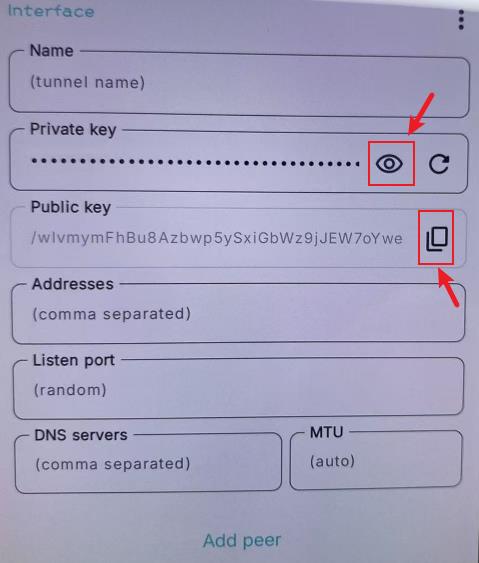
Tap the Generate button. Copy the resulting public key for router web configuration and private key for app client configuration.
-
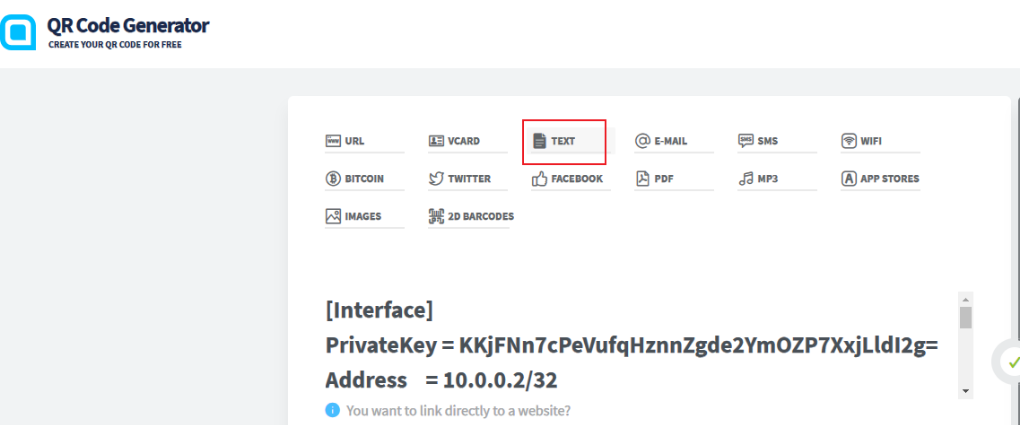
Generate a configuration QR code. The format is as follows:
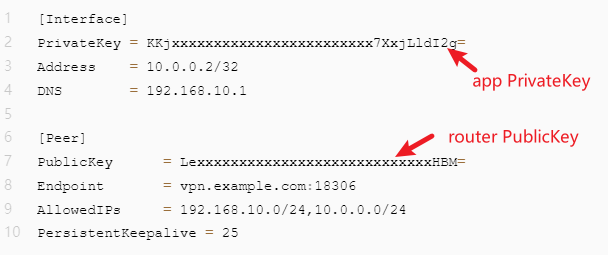
The endpoint is the same as the web UI configuration. The allowips is the subnet that this WireGuard client is allowed to access. Fill in the text according to the format below and generate a QR code from it: QR Code Generator
1
2
3
4
5
6
7
8
9
[Interface]
PrivateKey = KKjxxxxxxxxxxxxxxxxxxxxxxxx7XxjLldI2g=
Address = 10.0.0.2/32
DNS = 192.168.10.1
[Peer]
PublicKey = LexxxxxxxxxxxxxxxxxxxxxxxxxxxxHBM=
Endpoint = vpn.example.com:18306
AllowedIPs = 192.168.10.0/24,10.0.0.0/24
PersistentKeepalive = 25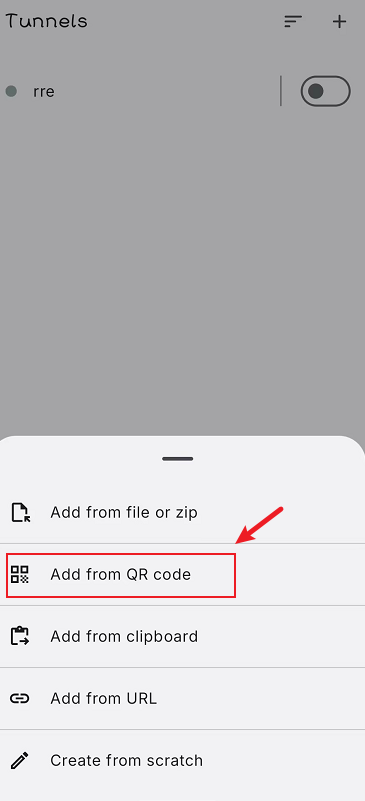
-
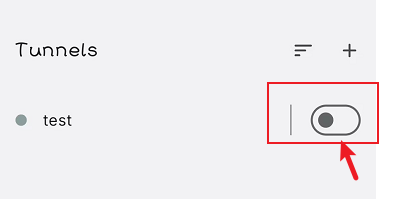
After importing the configuration, tap the Enable button.
-
Enable the connection and check if the smartphone has Internet access and if its IP address matches the WireGuard server's IP address.
| WireGuard Configuration | Configuration |
|---|---|
| Enable | [Toggle to enable] |
| *Local IP Address | [Enter the server's internal IP] |
| *Local Port ID | [Enter the server's monitoring port] |
| Local Public Key | [Generate or enter the server's public key] |
| *Allowed-ips | [Enter the allowed client IP range] |
| *Peer Public Key | [Enter the client's public key] |
| *Endpoint | [Enter the client's public IP and port] |
| *Keepalive | [Enter the connection keepalive interval] |
| Operation | Save |