Wireless Network
1. Wi-Fi Setting
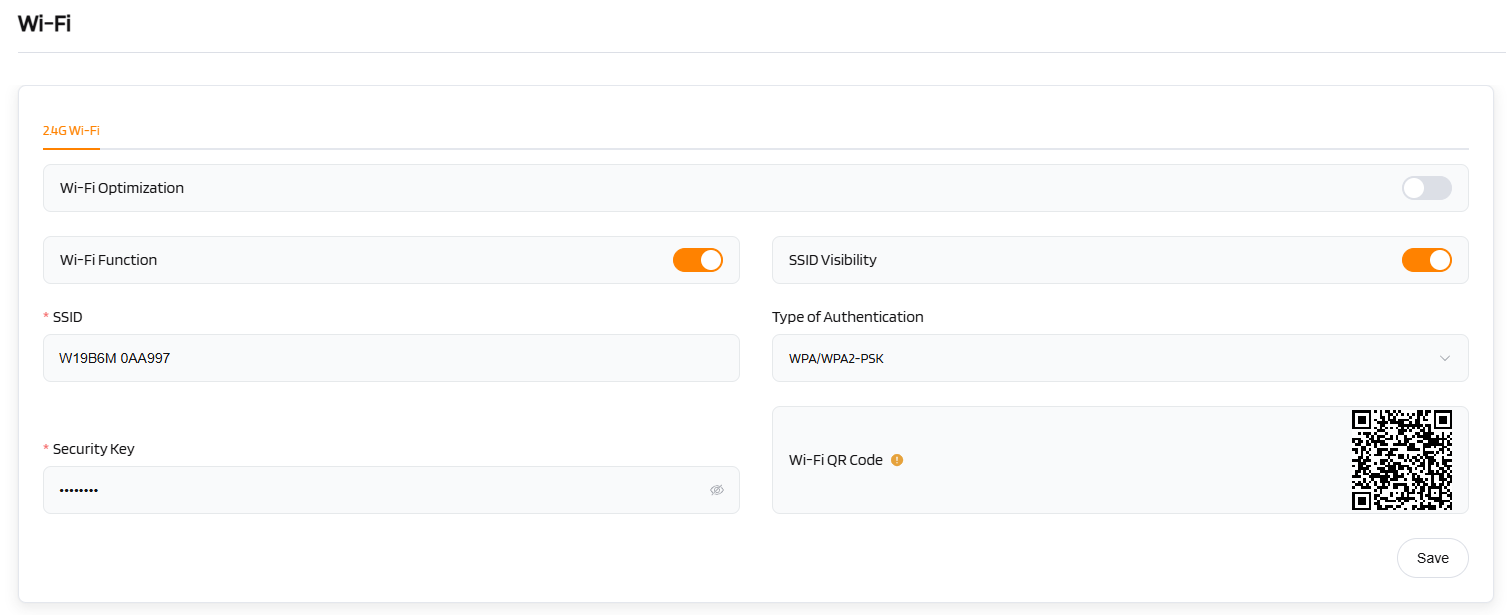
In Wi-Fi section, you can changethe settings of the wireless network created by the router. The wireless network can be turned on oroff by switching the ON/OFF button.
-
Wi-FiName(SSID): The name of the Wi-Fi. It is not suggested to use Unicode characters such as Chinese.
-
Wi-FiSecurity: The encryption method of the Wi-Fi.
-
Wi-Fi Key: The password of the Wi-Fi, which must be at least 8 characters long. We suggest you to changeit when you receive the router.
-
SSIDVisibility: Show/hide the Wi-Fi SSID.
-
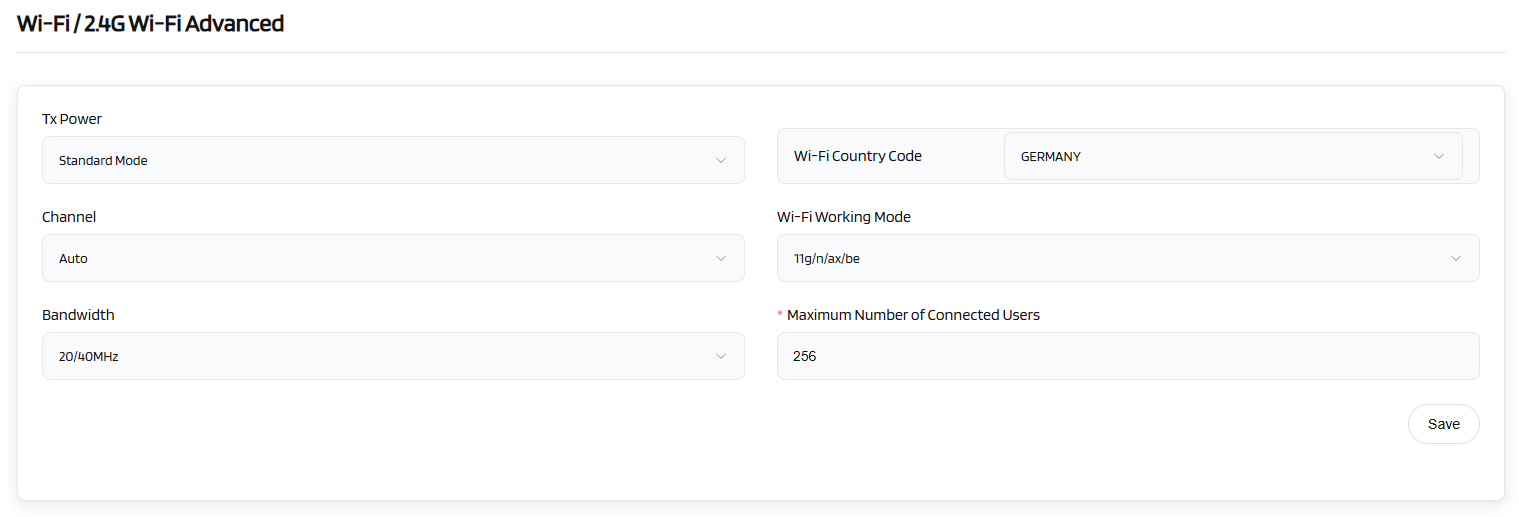
Wi-Fi Mode: The protocol of the Wi-Fi. It is suggested to use default settings (2.4GHz is b/g/n/ax/be, 5 GHz is a/n/ac/ax/be).
-
Bandwidth: The channelfrequency coverage range of the Wi-Fi. It is suggested to use default parameter.
-
Channel: The router will choose the best channel itself. You also can choose a channel manually. If your router is used as a Wi-Fi repeater, the channel will be fixed accordingto the connected wireless network.
-
TXPower(dBm): It specifies the signal strength.
-
Wi-Fi Optimization: It will optimize your Wi-Fi signal and channel according to the Wi-Fi environment.
-
Client Isolation: Controls whether devices connected to the same wireless network are prevented from accessing each other. Primarily used in public networks (such as hotels, cafes, etc.) to prevent unauthorized access between users'devices.
Danger
Enabling this feature may disrupt local network services requiring internal communication, such as LAN printers, screen casting, and NAS systems.
Click Save to change the settings ofthe wireless network.
2. MLO
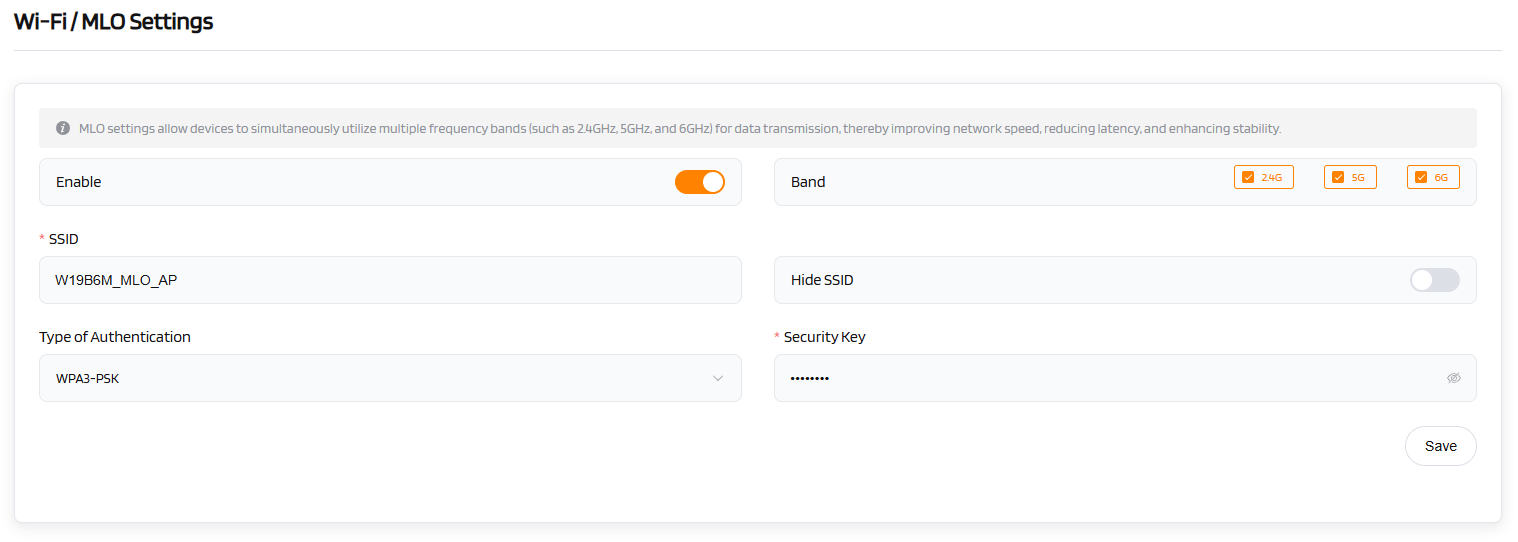
MLO (Multi-Link Operation) is a dark technology in Wi-Fi 7, the latest generation of wireless networking technology. The function is to allow devices to be networked through multiple frequency bands (e.g., 2.4GHz, 5GHz, 6GHz) at the same time.
Note
(1) Disabling Wi-Fi on the 2.4GHz, 5GHz, or 6GHz band settings does not affect the status of the MLO function. When MLO is enabled, the device will create a new MLO-based Wi-Fi network with aSSIDlike: "XXX_MLO_AP".
(2) Due to potential environmental frequency interference, high-traffic scenarios, and compatibility issues across different platform solutions, Wi-Fi instability may occur when MLO is enabled in a multi-device Meshnetwork environment.
3. MESH
(1) Mesh Indicator Status
| Mesh Indicator Status | Description |
|---|---|
| Green slow blinking (once per second) | Mesh networking in progress |
| Green (Always on) | Mesh network successfully established |
| Off | Mesh networking failed / timed out / disabled |
(2) Mesh-related Buttons
- Mesh Button: Short press to trigger Mesh networking (prerequisite: Mesh function must be enabled). The Mesh indicator will blink green slowly (once per second).
- Reset Button: Press and hold for over 6 seconds until all LED indicators blink, then release. The device will reset tofactory settings.
(3)Wired Mesh Networking
STEPS:
- Connect the WAN port of a router to the upstream gateway and power it on. Once the router has completed startup and has an internet connection (STATUS LED indicator stays green), it will function as the main router.
- Power on the secondary routerand use an Ethernet cable to connect its WAN port to a LAN port on the main router. Wait until both routers’ Mesh LED indicators turn greenand stay on, indicating that the Mesh networking setup is successful.
- Connect a PC or smartphone to the router's Wi-Fiandaccess the main router’s Web UI(refer tothe label on the back of the router for the IP), Log in to the router’s Web UI, then go tothe menu Wi-Fi > Mesh Network> Network Topology Diagram to confirm whether the secondary router is added.
(4) Wireless Mesh Networking
Prerequisites:
- Mesh function enabled on both routers.
- One router's WAN port is connected to the upstream gateway and already has an internet connection.
Note
Before setting up the Mesh network, please ensure only one router has WAN connection. If both routers have WAN connections, they will both act as controller(main router), making it impossible to establish the Mesh network. A successful Mesh networking setup requires one router to serve as the controller and the other as the agent.
Steps:
- Connect the WAN port of a router to the upstream gateway and power it on. Once the router has completed startup and has an internet connection (STATUS LED indicator stays green), it will function as the main router.
- Place the secondary router (kept in factory default settings) near the main router and power it on. Ensure it has no internet connection initially.
- Short press the Mesh button on both routers. Their Mesh indicators will blink green slowly (once per second). Within 2 minutes, if both Mesh indicators turn green and stay on, indicating that the Mesh networking setup is successful. Otherwise, repeat the process.
(5) Placement Guidelines
- Place the main router in the living room near the window or in another location with a strong signal.
- Place the router in the room, ensuring that the distance from the main router does not exceed two walls.
- If the distance between the secondary router and the main router is too long, or if there are too many obstructions, place an additional secondary router in the middle. (e.g. secondar router1 - main router - secondar router2)
(6) User Instructions
- After Mesh networking, all routers share the same SSID and password. Terminals can seamlessly roam between routers without requireing re-authentication.
- Changes to Wi-Fi settings (SSID/password) on the main router are automatically synchronized to the secondary routers.
- Some High-end smartphones can automatically switch Wi-Fi based on signal strength. (e.g., switching from the main to a secondary router when moving to another room).
- If the smartphone does not support automatic switching, toggle the Wi-Fi on/off to quickly connect to the router with the strongest signal.
- SSIDs may vary by frequency band (e.g., 2.4 GHz/5 GHz/6 GHz), allowing users to manually select the desired Wi-Fi if needed.